Showing posts with label W. Britains. Show all posts

Friday, March 6, 2015

Achtung! The State of My German Army

Fighting for the Fatherland, your 2015 German force:


Because they fight both my Soviets and my US troops, and because Ultimate Soldier/Forces of Valor/21st Century toys vehicles tend to be available every now and then for very cheap, they are by far the best equipped of my 1/32 armies.

They are the only force with an engineer (flamethrower in the picture below) and two HMGs ready to go (the US has one already, and a second awaiting painting, whereas the Germans have one waiting assembly and that's it). 

The right-most is the CTS HMG team from their older German infantry set, and the left team is from CanDo (1/35 pre-painted figures from Dragon).


The mortar crews are Ultimate Soldier  I believe. Well, one of those companies - I actually have 3 mortars for the Germans, but until I pant the Italeri gun crew for the PAK 40 (below), I have assigned them to serve the gun.


All of my armies have been based in the same way:  2 figures to a base, except for leaders and other special figures. The Waffen SS (W. Britain, behind Unit "Airfix") , I left singly based, since they will see use primarily in very small 1:1 scenarios against my British paratroops.


Finally, unlike the US with only one vehicle capable of moving personnel, and the Soviets, who have one awaiting assembly, the Germans are in rather good shape here (CTS and Ultimate Soldier) thanks to the Morsermannschaft  which came with the mortar crews (I gave the third one to my son. These things are models, not toys, and it was quickly destroyed, although he still loves to play with it.)

The kubelwagen (Britain Deetail) can transport an officer if necessary, but is usually used in a scouting role.


The figures are a mix of Matchbox, Airfix (which are my favorite), CTS, Ultimate Soldier and Britain. 

In the queue is the crew for the pictured PAK 40, as well as a 2nd PAK 40 and crew. I also have a King Tiger model to assemble, but I'm terrified of it and will start with something easier and work up to it. They will undoubtedly be the first of my forces to be able to meet any configuration Neil Thomas's scenarios throw at me.

Friday, February 27, 2015

10 Games, 10 Times: Iron Ivan's Disposable Heroes / Coffin for Seven Brothers

Soviets try to get their tanks across the table in a later game in the series.
i had played DH/C7B a handful of times before, initially not really digging it, but later coming to decide that it might well be my favorite set or 1:1 WWII gaming, for squad to a platoon per side. Yet, I hardly played it thereafter, and when i did, it was primarily infantry only conflicts, hence its inclusion on my 10 Games, 10 times challenge list.  


The first few games were straight up infantry affairs to help me shake off the cobwebs and figure out where I was forgetting rules.
Backing up, for those who don't know, DH/C7B is a 1:1 set of WWII skirmish rules, where the basic unit is the fire team. It's recommended for up to a platoon per side, with support, although you can extend it further if you have time or multiple players.

My sole gripe with the rules is the use of markers for tracking activation, pinned, acquisition status (for armor), and # of armor penetration hits. You also need some way of tracking the number of destroyed units for each side, as these, plus the # of currently pinned units effect the initiative score.

So many markers. The white cards are blinds - I used Platoon Forward for many scenarios, along with its enemy force generation method. This is from one of the last games I played in the series - after I had mounted the figures to 3 inch squares.
However, so many games require markers, that it seems like short of an all or nothing approach to hits, or off table tracking (difficult in a 1 figure = 1 man game with more than a handful of figures per side), there really isn't a better option.

So, other than that, the game has a lot going for it although it took me 5 or so games to really see how good they were, as I kept forgetting rules in the early games or situations just didn't come up:
  • The Guts score - it effects both initiative and morale, including the ability to rally. It's a mix of quality and motivation.
  • simplified movement
    • if one figure reaches cover, the whole group does
    • move one figure, then place the rest around that figure, rather than measuring for all
    • terrain does not effect movement rates of infantry
    • Movement rate determines what additional actions a unit may perform and any penalties
  • Snap (opportunity) fire is restricted to one enemy unit.
  • Using grenades to supplement a charge is abstracted and works quite smoothly
  • Taking fire, regardless of result, triggers a Guts check - this seems right to me, but surprisingly few systems I have played incorporate it
  • It is difficult to score a hit on a target in cover - based on what i've read about the expenditure of ammo in WWII to hit a target, this too seems right to me.
  • The way it handles armor.
I wanted to really go big,both because i wanted to see if it made a big difference in my enjoyment, and also as a way to see if I could at some point eliminate a table and the space it takes up. Playing on the floor was loads of fun but no more so than a table, as it turns out.

One thing that has flummoxed me about some other systems at the 1:1 scale has been armor: either they are too simple, and the type of vehicle does not matter, or too complex to the point of having to use calculus to understand the tables. DH/C7B's system for attacks by and against armor sits somewhere in the middle and I rather like it. It has enough flavor to get a feel for the period and the differences in equipment, but not so complicated that every rivet matters.

I had to fudge any vehicle that wasn't a tank, since no stats are included in the core rules beyond a vehicle or two per army.
One  downside is the mix of roll low/roll high is somewhat annoying - you want to roll low always -to acquire a target, to hit, to pass a Guts check, but  when you're rolling for armor penetration, then you want to roll high. 

It's hard to see, but the PZ. IV had just made it onto the table when one of the T-34s brewed it up on a single hit This is less frequent an occurrence than my pictures might relate.
The other is that the core rules, which contain the "big four" nations, do not include much in the way of vehicles for these. As such, I had to fudge a bit on anything not remotely covered. The force supplements contain the desired data but those are additional purchases.

The core rules do, however, cover tank riders!
Once again, the 10 Games, 10 Times Challenge comes through, and I have a new understanding and appreciation for this game. That said, I also have come to realize, that i prefer 1:1 games with 3-5 figures, rather than squad to platoon sized engagements. 

As a bonus, I suspect these rules could work well for that - treating each figure as their own fire team and disregarding the man-alone rule and the "only 1/2 figures per unit can shoot" rule. I may try them in that respect at some later date, but Five Men in Normandy awaits first.


Tuesday, February 17, 2015

Something for the Folks Back Home : 1/32 US Force on the Move

Somewhere in Europe, my US force advances for the camera so the folks back home can be proud of their boys:

The whole enchilada! 
Vehicles are a mix of CTS (tanks) and Forces of Valor (jeep and half-track). Figures are a mix of Toy Soldiers of San Diego, W. Britain, and some Ultimate Soldier (1 mortar crew and the listening post + crew). The camera man is King & Country.

Infantry are based two figures on 3" squares. These can be formed into three-base units of  2-rifle bases and one LMG base (this is true for most of my 1/32 WWII stuff now, save British paras, Waffen SS and unit leaders). This way, i can use 3 bases + 1 leader to field a 7 figure squad (one rifle team of 2 bases and one LMG team of one base) for games like Disposable Heroes/ Coffin for Seven Brothers, but I can also use them in games where 1 base = 1 squad, 1 platoon, etc.


.

Waiting for paint :
1 1/32 Classic Toy Soldier.105mm gun + crew
1 1/35 M-10 Tank Destroyer (waiting for assembly too!)

In order to field a force for any of the various combinations in Neil Thomas's One Hour Wargames, I need a 2nd 105mm gun. Fortunately, Father's Day is just a few months away! For now, in the rare event I roll a force with 2 anti-tank guns, i"ll either commandeer the Russian gun, or substitute the MG. 

I also have two TSSD mortars and HMGs with crews, and a number of unpainted TSSD figures, which I'll eventually paint, but they aren't top priority.

Friday, January 2, 2015

First Game Of the Year : A One Hour Wargames Scenario

I began the new year of gaming with a play through of Scenario #3: Control the River from Neil Thomas's One Hour Wargames. The objective for both sides is to control both fords and thus the river, before 15 turns pass. 

OHW scenarios seem to all have 15 turn limits. Regardless of the rules used, I have only hit the 15th turn one time in 10+ games using scenarios from the book. In my experience playing the 1st two scenarios, that limit does very little to force movement, and so, I have modified the turn limit to 10 turns  + 1d6-1 turns if necessary.

OOB Randomly Generated by the method in OHW:


U.S.A. Germany
3 Infantry Units 4 Infantry Units
0 Mortars 0 Mortars
1 ATG 1 ATG
2 Tanks 1 Tank

For those who haven't yet read somewhere else, OHW limits forces to 4 unit types, and a max of 6 units per side, to fit the game within a 3' x 3' space.

The WWII rules in One Hour Wargames use a 4-6" frontage for Infantry, which represents a platoon, A single tank model represents somewhere between a section and a platoon., a mortar represents about 3 mortars and their crews, and ATGs represent about 3 such guns and their crews. 


I played this scenario on 12/31/14 with the OHW WWII rules as written (I don't dislike them, but I don't love them), but then kicked off the New Year using my own rules that are a mash-up of Morschauser, Featherstone, Cordery and Mr. Thomas himself. I've been playing these rules a lot over the past week, tweaking them here and there - I'll post them eventually.

In this scenario,  both sides start off the table and arrive on turn 1. Since I'm playing solo, I diced the location of all units on turn 1, and then play began with turn 2. 


FYI, the grid is not in use during this game, it's just on the cloth - although it does help with measuring. The sad plastic trees indicate where the fords are.

Here's what the dice gave me:

Early in the game probably turn 2, the Germans appear to concentrate on their right:


But it was a trick, and the Germans split their force to take each ford:


In my rules, a unit is two bases, and can take two hits before being completely eliminated. Units throw one die per base, so loss of a base impacts combat effectiveness. You can see one German and one US unit reduced to one base in this picture.
The clash on the left:


On the right, things aren't quite as bad. Or so it would seem. Shortly after this picture was taken, the pictured US platoon was destroyed:


The guns blaze away and the dice are merciless, yet neither side has definitively taken control of one ford, let alone two:


 One of the high points of the game, the ATG scores a hit and brews up the PZ IV:
It's not enough to score a hit on armor. I'm using Featherstone's method of rolling 2d6 and on a score of 9 the tank falls back 1 move, a 10 it falls back two moves and on an 11 or 12 it's destroyed.

It looks like things could go either way at this point - we're nearing turn 10 and no one has control over both fords. The German platoon on my right seems to have things under control, and on my left, the ATG will provide the other German platoon with some protection from the Sherman:


Alas, it is not to be for Germany, and the US eliminates them entirely with some well placed rounds:

I don't think a PAK 40 would smoke if hit but I like the visual!

A fast and enjoyable game that could have gone either way - I've already played this scenario twice since, once again with Mr. Thomas's rules and once with my own.

As I said, I'll post some thoughts on the book itself later, but I will say, whether tor not you play the OHW rules as written, the scenarios, and the small space they require, makes the book a must have for those of us who don't have access to a space much larger than a kitchen table.

Friday, December 5, 2014

Portable Wargame : Modern aka 1/32 WWII Antics on a Grid

I decided to play the same Escort the StuG scenario I played with Blitzkrieg Commander, but using Bob Cordery's Portable Wargame : Modern. All of his Portable Wargame rules can be found at this site.

My table is 4' x 4', divided into a grid of 6" squares and thus, 8 x 8.


Orders of Battle:
USAGermany
9 infantry units (3 platoons) 6 infantry units (2 platoons)
3 platoon leaders 2 platoon leaders
1 ATG 1 StuG
1 mortar1 Company Commander
1 Company Commander


German mission: Get the StuG across the table. Infantry are expendable.
USA mission: Destroy the StuG.

I diced for each side's approach. As fate would have it, the US would send 2 platoons around to their left while the center right platoon would fall back to hold the woods. The Germans would sweep to their own left, to cross the road south of the village.

Here's the setup, the US has quite an advantage of numbers, firepower and position.


The German infantry move slowly to avoid outpacing the StuG, which is stuck in the woods (movement reduced from 2 squares to 1). The US left platoon advances to the village, the right falls back to form a defensive line, per their orders.


Yes, the rubble pile in lower third of the picture moved from the 1st to 2nd turn. I had it in the wrong place!
I got too caught up in the action that followed to accurately record when the next two pictures were taken.

Below, US troops await the coming German force.


And here they come!


The battle was fast and furious; the US lost 4 or 5 squads, while the Germans lost two, with the StuG being hit repeatedly by mortar, ATG fire, and infantry close assault, but escaping destruction each time. 

(The StuG always rolled 5s and 6s to see what the result of a hit would be, and fell back 1 square each time, rather than be destroyed).

A brave squad made a last ditch close assault on the armored sides of the StuG but alas it was not to be. 


On the next German activation, the StuG made it off the table. German Victory. From set up to victory in 1 hour.

Of 3 games played, this was the first German success. In both the BKC game, and in the Big Board Portable Wargame, the StuG was destroyed.

Here's a picture I rather like, from the Big Board Portable Wargame played earlier in the day:


The layout I used was much more in line with my aesthetic preferences this time, and would have worked just as well with BKC. Note to self: if adapting a Crossfire scenario, go easy on the terrain and scenery.

Figures for the US are a mix of W. Britains and Toy Soldiers of San Diego. The exception being the ATG which is from Classic Toy Soldiers.

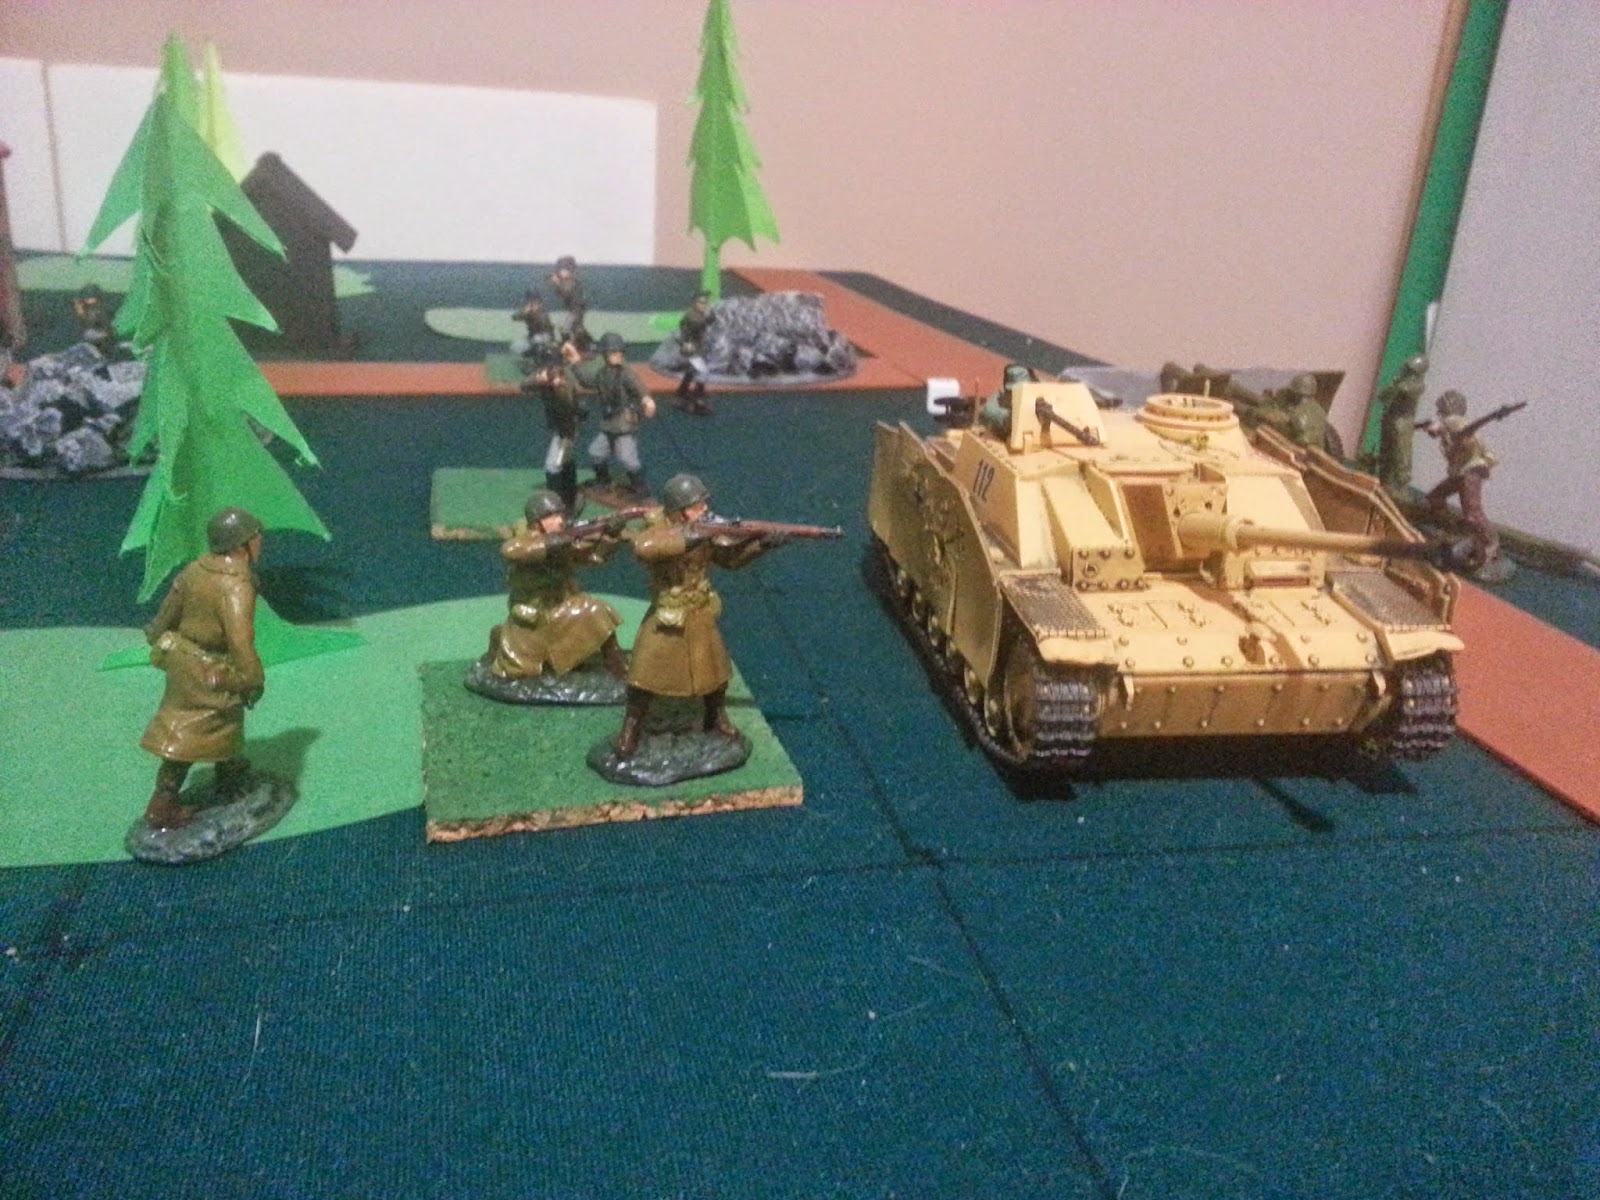
Figures for the Germans are a mix of Matchbox, Airfix and Classic Toy Soldiers.The StuG is 21st Century Toys.

Tuesday, December 2, 2014

Blitzkrieg Commander : Escort the StuG

Yesterday, I started having uncontrollable urges to play Blitzkrieg Commander again. 

After clicking around the Internet, I found a bunch of scenarios for company-level actions and came upon a number of Crossfire scenarios over on Lloydian Aspects.  (which I had bookmarked already, funny that). I liked the simplicity of the  "StuG smuggling" scenario, so that's what you see here, albeit shrunk down to a 3 x 4 playing surface, and with my 1/32 toys.

Unfortunately, as is often the case, it was too late to start gaming by the time I had the table setup. Luck was on my side though, and Pumpkin didn't launch the attack without me.


The mission for the Germans is to get the StuG off the opposite side of the table; infantry are entirely expendable. The US is there to try and stop them.

I got two turns in at lunch today. Here's the cluttered table after turn 2:


This is way more stuff than I usually put on the table - I tried to stick to the fact that the scenario was for Crossfire, which has tons of terrain and scenery. In retrospect, I probably should have used the whole 4 x 4 space, but as you can see peeking out the top of the frame, there's a pile of junk I would have to move.

It isn't pretty, but, still, I think it looks like playing toy soldiers.

Tuesday, August 12, 2014

Mixed Company : Some Morschauser and Blitzkrieg Commader

The other night, I wanted to play a wargame, but I wasn't quite ready to begin Blitzkrieg Commander. At the same time, I've kind of had my fill of Nuts!, for now and really feel drawn to games where 1 base = 1 squad, where individuals don't matter so much as whether or not the squad is still fighting, and where they are.

The end result: I gave Morschauser's modern rules  as appearing in the John Curry reprint, an outing (supplemented with a bit of info for mortar ranges from Bob Cordery's grid-based modern game in the same volume).

For the scenario, I used Grant's Holding Action (1) from Scenarios for Wargames. 

I used squads for the scenario's infantry units, which made the game a fight between an under-strength company and a reinforced platoon. 

For Light Infantry, I gave each side an anti-tank squad, and for guns, I used HMG and mortar squads. Cavalry was a tough one as I have few vehicles and no actual cavalry; for the Germans, light cavalry was a kubelwagen and nothing in the case of the US, while heavy cavalry were tanks.


Paper slips are German blinds.
The rules play fast and furiously - I had time to play the game twice, once as the attacker and once as the defender. In both cases the attacker won. Although I set an 8 turn limit, the US won in 5 turns, the Germans won in 6. This is a tough scenario for the defender and I think on my table, with these rules, for a real challenge, victory must be achieved by the end of turn 5 at the latest.


Germans marching towards victory.
In any case, when I finished playing, I wondered why I was bothering to try any other rules - they are the perfect toy soldiers type game, using bases instead of individual figures. They have the ability to be quick, with 1 hit taking out a base (and thus no bookkeeping), or slowed by using a roster. They are easily modified - as written there are no morale rules, and adding a saving throw and suppression would be possible, too.

Still, Blitzkrieg Commander (1st ed.) is on my 10 games, 10 times list and it does have some stuff that I find interesting.

So, with the same setup, plus the addition of my newly arrived German mortar team (OK, teams. I bought 3 of them), I began playing my first BKC game on Sunday night. Unfortunately, I ran out of time before the game reached a conclusion, but I got a decent taste of the command phase, of movement, and firing. 

On Monday, with the same table, I ran it again, this time to completion, but I doubled the ranges per the suggestion in the rule book for company-sized games. And, surprising to me, the Germans won as the defender!


2nd BKC game : The US advance is clearly having problems.
My early thoughts:

In the second game, the roll for command kept the American attack from ever developing - my mortar and anti-tank team never even made it on the table. One platoon never got their part of the advance under way, staying stuck on the road near the table edge after being forced back by the German mortar. This was frustrating as hell and, thus, already a favorite mechanism.

I really like the "press your luck" mini-game that the command phase uses. 


Just about the only thing to go right for the Americans.
Doubling the ranges for a company-level game is fine, but it felt too "simulation" and not enough "playing with toy soldiers". For the next game, I'm thinking of doubling movement, but keeping the firing ranges unchanged. This almost directly maps to Morschauser's ranges.

There seems to be a fair number of people who dislike the removal of hits at the end of a turn, but this doesn't bother me.

Suppression on the tanks by small arms fire can be very effective and helpful. I found this out a bit in World War Risus games, but it really is a lot simpler to do here.

With the doubled ranges of the second game, i had units able to act in the initiative phase (when i remembered it). This can greatly speed up the devastation. Making a game that is already fast-play, a little faster play. Start to finish, with tons of pictures (only some you see here) and plenty of rule book referencing, it took 90 minutes.

Friday, August 8, 2014

Team BBC is Off the Air

The other night I played my 3rd game of Nuts! using the Chocolate & Cigarettes rules, and the 10th game of Nuts! Final Version. 

The picture speaks volumes:

No custard tarts today.
Things got off to a bad start when the first PEF resolved as a squad with 6 members and Deacon was knocked out of the fight. That was on turn 1. 

Although Hardcastle killed the German NCO, and managed to drive off the LMG crew (they passed 0 on Man Down test and left the battlefield), the Germans ended up receiving a reinforcement of another LMG crew on the next turn, so no gain there.

Both Peacock and Hardcastle were eventually dropped as Out of Fight as seen above. So, they aren't dead, but they are undoubtedly prisoners of war now. 

Perhaps an escape scenario will occur at some point in the future?

****
As for Nuts! Final Version, this was the 10th game in the 10 game challenge. There is no doubt in my mind that the experiment proved its worth. I feel  I know the game far better than I knew the previous edition and I've given it a genuinely fair shake.

I think the Chocolate & Cigarettes size games work quite well, although I had no chance to use any of the challenge rules for the additional character stats. This was a result of the scenario choices I made and not a function of the rules. Maybe if I play an escape scenario, they will see some use.

I won't be using Nuts! as my default squad to platoon rules, but will Nuts! Final Version : Chocolate & Cigarettes become a staple? 

I recently acquired Five Men in Normandy, so, some day I'll be trying those out, but in the meantime, I think Nuts! FV: C&C is just about perfect for this type of game, providing lot's of action and drama with just a few figures per side.

Monday, August 4, 2014

More Nuts! Chocolate & Cigarettes : Escort the Wounded

I decided on an "escort the wounded" scenario for my second go at Chocolate & Cigarettes.

Operation: Hyacinth - Team BBC must escort a wounded army private out of enemy territory, i.e. across the table.


OOB (I left these details out last time. Oops.):

  • Lt. Corporal Hardcastle - Rep 5, Fit: 5, Pep: 3, Sav: 4, Tough, Steely Eyes, Exceptional Fixer, Smooth
  • Lance Cpl. Peacock - Rep 5, Fit 3, Pep: 5, Sav: 4, Initiative, Smooth, has a hunk of cheese
  • Pvt. Deacon - Rep 5, Fit 3, Pep: 5, Sav:4, Hard as Nails, Attractive
  • "The Walking Wounded" - Rep 3, temporarily Rep 2 per scenario setup
As part of the scenario, the wounded can only move a maximum of twice their Rep. So, yeah, FOUR INCHES.

Good lord.


Here's the table with Team BBC and enemy PEFs in place:


[Turn 1, Germans 6, Brits 3. German PEFs won't move.]


Our heroes move through some woods. Hardcastle and Peacock take the lead to make sure there aren't any surprises.


[Turn 2, Germans 2, Brits 1, PEFS all pass two dice and move 8" towards Team BBC]

A surprise was indeed making its way towards them: a single SS-Panzergrenadier armed with an assault rifle. 


Peacock got the draw on the kraut and blasted away. 


His aim wasn't good enough.


[Peacock won the In-Sight check 3-0, he fired and scored enough to hit, but when checking the result, the enemy ended up merely knocked down and able to carry on.]


The German fired at Peacock who ducked back into cover under the barrage of bullets.


[Peacock passed 1 on his crisis test, and, since he has a BA Rifle, he is outgunned and ducks back]


Hardcastle raced up to join the fracas, but the SS trooper was ready. Dodging bullets and unphased, Hardcastle unleashed a fury from his SMG that dropped the enemy.

[Hardcastle moved up and triggered another In-Sight. The German won 4 to 1, I held my breath and hoped for the best: he missed! Hardcastle took a crisis test for receiving fire and passed 2. Even though he was outgunned, as a star I could choose his reaction, so, he returned fire and dropped the dastardly German; Jean would be proud. ]


[Turn 3 the team advanced. The sides tied for initiative on turns 4 and 5 ]


Hardcastle crossed the crest of the hill and hit the dirt as movement from the hill to his right and front caught his eye. A tense few moments passed until he realized it was just his nerves and that his mind had drifted to custard tarts.

[A PEF moved over the top o the hill and passed 0 dice to resolve.Right about now I was starting to feel pretty good.


Turns 7 and 8, the team continued their advance, going prone immediately after moving. This costs half movement to stand the next activation but, as I finally learned, the benefit when receiving fire is totally worth it.

On Turn 8, the Brits scored a 4 for initiative and the Germans a 3. With a total of 7, I could have checked to see if the Brits got reinforcements, but like I said, I was feeling pretty good.


Never a good sign.]


Peacock had leap frogged past Hardcastle to the hill to their front and took up a position watching the forest to their right. Something was out there.

This time Lione's hunches weren't custard card dreams, but an SS LMG team. In his haste, Hardcastle opened fire but was wide of the mark. The LMG fired at Peacock and dropped him, wounded. Then they turned their gun on Hardcastle and by the luck of the gods, missed him. 


[For the In-Sight, since Peacock and Hardcastle were two different groups for activation purposes, each of them took the test separately.


Hardcastle scored 3 successes

Peacock and the LMG team tied with 2. On their re-roll, the LMG team scored 2 successes, while Peacock only scored 1.

For the sake of activation it means that Hardcastle gets to act, then the LMG team, and then reactions are taken and the active side completes their activation if they can. 

As noted on the last page of the rules, it's not about winning In-Sight, but about not losing it.]


In a hail of bullets, Hardcastle dropped the gunner. The loader, unable to return fire, ducked out of sight.

[The LMG team passed 1 for their crisis test for received fire, which resulted in a snap fire at Hardcastle. Their results: 444321. All miss because he is prone.

For Lionel, I put 2 dice on the gunner and 1 for the loader. Boom! Obviously Dead result for the gunner.

The loader passed his crisis test for man down with 2 dice, but he was outgunned, so ducked back.]


The firefight continued between Hardcastle and the loader, who, seizing initiative, grabbed the MG-42 and opened up on Our Hero.

[Three of the dice hit and one resulted in an OOF. 

But, Lionel is the star and has Star Power. He scored three successes and shifted the OOF to knock down but carry on (he's already prone, so there's no knocking down) ]

Bullets whizzed by his helmet, one ripping a hole in his sleeve. Angered at the damage to his fastidiously maintained uniform, he dropped the loader cold in his tracks.


Even before the last gurgle of life left the German, Hardcastle ran to Peacock to ready to carry him out.


[On Turn 11, the initiative summed up to 7, in favor of the Germans. This led to a new PEF right next to Deacon and the wounded.


SON OF A &%#!@!*&%]


[Fortunately it only passed 1 die, and resolved to nothing. Thankfully, no additional PEFs appeared before the team made it across the table. ]


Mission : Success!


After the mission, I checked for Peacock's status (a rule I had missed on EVERY PREVIOUS GAME PLAYED) and he passed two dice, meaning he returns to the squad for the next mission.

Tuesday, June 24, 2014

Nuts! Final Edition : Some Pictures and Reflections

I already see the point of the 10 games, 10 times challenge : it's all too easy to miss things in the first second, or even third play. It is not enough to just read rules, you need to PLAY them. 

And play I did - 3 more games of Nuts! - bringing my total to four, so far. 

Because I know I'm playing ten games, there is incentive to play the next one and make sure I fix any mistakes I made previously. I want to make sure that I'm not assuming things, so there was a lot of page flipping, with games taking around 2 hours to play and document. 

There is definitely a learning curve, as with all but the simplest rules. I missed things each game, mostly related to the control of the non-player force, but by the fourth, I had much of it committed to memory, or at least knew where to look when I wanted to be sure of my understanding.

Patrol Mission Setup. '44. France Somewhere.
I even found the rule I was hoping for regarding multiple groups and the In Sight test on what would be page 104, if it was numbered.   Unfortunately, it only made the matter a tiny bit less foggy.

Germans pinning down my men in the yellow farm house. Sarge and Pvt. Harry move up to lob grenades.
I'm not sure about the logistics of tossing grenades over hedgerows, but it sounded right.
Looks like things might go my way, right? Nope.
Despite their losses, Germans would kill or capture the entire team in the yellow farmhouse.

Second game.
Mission : Defend
Enemy Objective : Exit from my edge of the table.
I took my squad (dubbed 1st squad) and another squad, aptly called 2nd squad)
I made the Sarge a Star, and rolled up attributes per the rules for all of 1st squad.

I had the bright idea to send 2nd squad's BAR team up to identify the last PEF.
Turns out there was one in the ruined building.
(all buildings automatically contain a Potential Enemy)

The figure top center lobbed a grenade up over the hill and that was followed by the remainder of the Germans charging into melee. Melee is brutal, as seen here.
Red 6s are Dead, Red 3s are Out of Fight.

A chaotic and deadly melee at that.
You can see 1st squad, bottom left, trying to join the fight.

On a combined score of 7 for initiative, the higher rolling side gets to roll for reinforcements. Germans rolled high:
It's only a squad because I ran out of figures for the "rest of platoon" called for.
I decided my forces would fall back with the wounded.
The biggest thing I have learned so far is: 

If i had been in charge of the US forces in WWII, Hitler would have conquered North America.

Setup for 3rd game.
Mission : Defend.
Enemy Objective : Eliminate us.
I took a whole platoon sans HQ this time.

Everyone in the clear is actually prone (both sides), except the guys on the road.
They are running, but they are sitting ducks.

His last moments caught on camera.
This is just the 2nd turn! Do not get caught in the open!
This game lasted all of 4 turns before 2nd and 3rd squad retreated off table (by my decision, not game mechanics) and first squad was reduced to 2 men as they tried to flank the Germans in the woods.
To that I would also add, I need to throw out all of my six-siders, because clearly they have a pro-German bias

Make no mistake. These games have been enjoyable - full of emotion high and low, and I'm looking forward to the next game. 

Speaking of, the next game will be a patrol on the Eastern front; perhaps my Soviets will fare better. 

But, first, I should probably read up on small unit tactics, because clearly, I have no idea what I am doing!