Showing posts with label 1:72. Show all posts

Thursday, January 23, 2014

Rising Sun: Operation Watchtower: The Goettge Patrol

Last night, I played the first scenario from Britton Publishers' "Rising Sun: Operation Watchtower", The Goettge Patrol.

***** Historical Background *****

The historical action took place on August 12, 1942. A small patrol consisting of Lt. Col. Frank Goettge, some 24 marines and a surgeon set out to land west of Matanikau where, according to a Japanese prisoner, there were soldiers in dire straights and willing to surrender. Originally intended as a combat patrol, Goettge had changed the mission to a humanitarian one - and this change caused excessive delay; the patrol did not depart until night had fallen.

Things went to Hell, thereafter. 

The Marines landed at the wrong spot. Their amtrac which had gotten stuck on a sandbar, had, according to some sources, alerted the Japanese to their presence. 

http://guadalcanal.homestead.com/
When Goettge and 2 marines made a reconnaissance patrol down a path into the jungle, they encountered Japanese soldiers, Goettge was shot and killed. 

The two Marines managed to escape back to the beach to join the main body of the patrol which would spend the rest of the moonless night being picked off one by one by the Japanese. 

http://guadalcanal.homestead.com/
Three men survived - two who had tried to reach the American lines to bring reinforcements (it was too late to save the patrol), and one who retreated into ocean to swim (4 miles!) back to the American lines, when he was the last man left.


***** The Set Up *****

The Britton Publishers scenario begins with the 2 squads of marines and a platoon HQ on the beach and a company of Japanese in the jungle making their way towards the marine position. The Japanese have 4 turns to eliminate the marines.

One key point, 4 turns is in terms of Britton's MicroMelee game for company level actions, which allows units 1-6 actions per "phase." Having no idea what this means, I decided on a 12 turn limit for David Newport's Tactical Combat WWII rules, which are my preferred company-level rules.

Tactical Combat, like, from what I have gathered, MicroMelee, uses 1 base per squad. However, it seems to me that, if you have the figures for it, you could play this 1:1 with Nuts! or Disposable Heroes or any other 1:1 set of rules. 

Britton provides a handy map of the table, which I duplicated to the best of my ability - although I reduced the table size to 3' x approximately 2' 33"  (the water is craft foam sheets that are 9" x 12").

I deployed my Marines in the center of the beach near the water's edge per the historical situation and then placed the Japanese by platoon, using a d6 1-2 = left, 3-4 = center, 5-6 = right. I placed the mortar squad with the company HQ in the same way.

Rather surprisingly, I ended up with the Japanese in a line from end to end - which almost never happens when I distribute forces by die roll.


MicroMelee has some sort of quality rating for each squad, so I translated that into Tactical Combat WWII terms.

The rifle squads range from TQR2-4 in MicroMelee, so, I interpreted that as Green to Elite in Tactical Combat WWII and then rolled a d6: 1-2 Green, 3-4 Average, 5-6 = Elite.

  • Platoon A (right): 1st Squad: Elite, 2nd Squad: Average, 3rd Squad: Average
  • Platoon B (center): 1st Squad : Green, 2nd Squad: Elite, 3rd Squad: Average
  • Platoon C (left): 1st Squad: Average, 2nd Squad Elite, 3rd Squad: Green
  • The mortar squad is Green.

The USMC squads are both Average.

The marines would start with fox holes dug, which would give them soft cover and force a +1 on the Japanese attack rolls  (in Tactical Combat WWII, the higher the number the worse the result when attacking).

Because the scenario is set at night, I decided that long range fire was at +2, normal to long range was at +1, and within one move was at +/- 0.

The marines couldn't see into the jungle and thus I wouldn't allow them to fire at the Japanese until the Japanese had moved onto the beach (if they did).

To control the Japanese, I set up the following:
  • If they are out of range or no line of site, move up to range/LOS.
  • At t long range, roll 1d6:
    • 1-2 Fire
    • 3-4 Light Mortars fire, all others advance 1 move
    • 5-6 Advance 1 move
  • In normal range but more than 1 move, roll 1d6:
    • 1-2 Fire
    • 3-4 Light Mortars fire, all others advance 1 move
    • 5-6 Advance if Marines in cover, else Fire
  • Within 1 move, roll 1d6:
    • 1-2 Fire
    • 3-4 Advance to close combat if enemy is paralyzed or suppressed, otherwise Fire
    • 5-6 Advance to close combat
Although historically the Japanese didn't swarm the beach until the marines had been, to their knowledge, completely eliminated, that seemed really boring from a wargame perspective, hence why there's so much movement on those tables. 

Also, before the game started, I had decided that the Marines would sit tight and try to use their limited cover to increase their chance of survival, so I did not include an option where the Japanese would hold their action in order to use Opportunity Fire (only squads that do not activate/attempt activation can fire during their opponent's Movement phase).

The Japanese were the attackers, and so they would go first each turn. 


***** The Game *****

Turns 1 and 2 were simply advances made by the Japanese. The first move got them to the edge of cover, the 2nd allowed them to break out onto the beach. Marine rifle fire from the squad on the right managed to suppress a Japanese squad (B1, right most squad, center platoon).


Turn 3 saw more rifle fire exchanges.


In Turn 4 the first Japanese squads charged in for close combat. The marines made a strong showing and beat back the attacker with minor injury. Turn 5, they continued the close assaults, supported by fire from some of the squads.


Unable to hold out against the continued onslaught, by the end of Turn 5, the USMC squad on the left is driven back into the shallows of the water.

Still, they fought on despite having 2 hits (3 eliminates the stand), and in Turn 6, they took out the 1st Japanese squad.


The Marine squad on the right, which started the turn in perfect health was completely destroyed by the close assaults.

On into Turn 7, the Marine squad defended against attack after attack - eliminating THREE Japanese squads before finally succumbing to the superior numbers.


***** Thoughts on the Battle *****

I made it past the half-way point, and took out 4 Japanese rifle squads and 1 Japanese platoon HQ, so I don't feel too badly about my performance here.

If I were to play this again, with the same distribution of Japanese platoons evenly across the table, I would hold my Marines until the Japanese had committed, and then sweep out to one or the other side, to flank them. 

The idea would be to buy time by distancing my squads from the bulk of the Japanese force and limit the number of enemy squads that could engage them. Continued motion, rather than staying in any one spot, might increase the chance of survival.

Close combat, with the fox hole defensive advantage, slight as it was, may have extended the life of the Marines. That advantage would be lost if I used the fight-move-fight method above. But, the right Marine squad had two hits and won 3 rounds of close combat in turn 7 before being eliminated, so I'm not convinced that cover advantage meant all that much.

I lucked out that the Japanese mortar stand was useless - I rolled 9s and 10s every time it attacked.

Had it struck home it would have been disastrous for the Marines. 

Before I remembered it was night, I had planned to use it to lay down smoke, to give the advancing infantry some cover, but that was of no advantage at night and even if it had been day, it would only provided limited cover as it was just one single mortar stand. A handful of stands might make a big difference however in a daylight battle.

Thursday, December 19, 2013

2014 Goals: Great Northern War Project Planning


The other day, in a fit of "productivity", I spent some time going through the Tabletop Teasers by Charles Grant, presented over at Steve the Wargamer's Tabletop Teasers page.

Although I intend to play historically-based scenarios with respect to the Russian-Swedish portion of the conflict, I know full well, I'll play fictional encounters more often. I have Programmed Wargames Scenarios and Scenarios for Wargames, but both suggest a rather large number of units for any given scenario. Eventually I may complete that many, but in the meantime, I want to play. 


What can I say? Patience is not my strong suit.

The Teasers from Battle and Military Modeling on the other hand are a good bit more manageable - several could be played with 4 units or less of cavalry and infantry, and 1 unit of artillery. So that's my starting point.

My original plans included 12-figure units, but that's still a lot of painting before the Swedes can take the table (the painted Russian infantry is 72 figures strong).

But, reduce the size of the units and voila! On the table sooner.

Really small units (like 4-figures per) can look odd though - unless they're on a grid. And there is the first goal - enough figures to play a grid based game where 1 unit = 4 infantry, 2 cavalry or 1 gun and crew. 

For an example of what such a thing might look like, see Fitz-Badger's Sowitzer League posts here, here, and here.

The next goal is to expand either into larger grid games (larger units or larger grid spaces for more figures) and grid-less games. For this, 8 figures per infantry unit and 4 cavalry figures per unit, in my mind, works quite well for this.

 If you question the aesthetics of an 8-figure unit, again, Sowitzer League provides: here and here.

Finally the large table (for me) game, using 12 figure units of infantry and 6 figure units of cavalry. Each unit would also have an ensign + NCO per All the King's Men's rules.

Based on what I've completed already, here is a painting schedule for 2014 to get me to the 4 infantry units-2 cavalry units -1 artillery unit + 1 officer (with extras sprinkled in):

  • Jan - 6 infantry (Swedes), 1 gun + 4 crew (Russian), 4 cavalry (Russian), 1 officer (Russian)
  • Feb- 6 infantry (Swedes), 1 gun + crew (Swedes), 4 cavalry (Swedes), 1 Officer (Swedes)

By the end of February I should be able to play grid-based games.

  • March - 6 infantry (Swedes), 4 cavalry (2 Russian, 2 Swedes), 1 gun + crew (Russian)
  • April- 6 infantry (Swedes) , 4 cavalry  (2 Russian, 2 Swedes) , 1 gun + crew (Swedes)
  • June - 6 infantry (Swedes), 2 officers/ensigns (1 Russian, 1 Swede)
By the end of June, I'll be able to field 2+x as many 4-figure units or four 8-figure infantry units, two 4-figure cavalry units and two guns each.

  • July -6 infantry (Swedes), 4 cavalry (2 Russian, 2 Swedes)
  • August - 6 infantry (Swedes), 4 cavalry (2 Russian, 2 Swedes)

By end of August, if I stick to this schedule, I can field four 12-figure infantry units, two 6-figure cavalry and 2 guns each.

  • Sept - 6 infantry (Swedes), 4 cavalry (2 Russian, 2 Swedes)
  • Oct -  6 infantry (Swedes), 4 cavalry (2 Russian, 2 Swedes), 2 officers (1 Russian, 1 Swede)
  • Nov  - 6 infantry (Swedes), 4 cavalry (2 Russian, 2 Swedes)
  • Dec - 6 infantry (Swedes), 4 cavalry (2 Russian, 2 Swedes)

By 2015, theoretically, I will be able to field: 

Six 12-figure infantry units, three 6 figure cavalry units (I'm not even sure I have enough boxes to do this!) + two guns each

OR

Nine 8-figure infantry units, five 4-figure cavalry + two guns each

OR
Eighteen 4-figure units, ten 2-figure cavalry units + two guns each. Might need some more guns!

Saturday, October 26, 2013

The Swedes are Coming!

These took forever, despite the rather simple color scheme. My colors (particularly the shade of yellow) might not match everyone's conception, but I based my paint selection on a number of sources, illustrations and photographs of actual uniforms (which have undoubtedly faded quite a bit over time). 

Most of the regular Swedish infantry regiments wore blue coats with yellow facings by the 1700s. I will probably paint all of mine this way:


One issue I had was the blue coat over the the black base - it was very dark. I painted white over the coat, and then blue, and the result was marginally better. From a time perspective, it adds substantial time per figure and I'm not sure I'm willing to do that. 

The next 6, I'll do without the white and see what the result is with multiple coats of blue.

Sunday, August 25, 2013

Great Northern War Phase 2: Swedish Infantry

On Friday, a copy of Terry Wise's Introduction to Battle Gaming arrived. It took about 30 seconds of skimming through and glancing at the pictures to become inspired, especially by his focus on 20mm plastics.

So, with that bit of momentum to carry me into Saturday evening and today, I started getting my Zvezda Swedes ready for painting.

The figures are very clean and despite my hack job freeing them from their sprues, they needed little other than a clean up of the bases, from my perspective. 

Others may want to go around looking for mold lines and such. I have done that, but usually at great peril to the figures - not to mention it's time consuming, mind numbing and completely deflates any bubble of enthusiasm I may have for the entire painting task.

This time, I decided to let sleeping dogs lie.

And here they arrayed for priming:

 
 This represents two boxes of figures, 43 per box. 

Notice the paltry number of pikes - odd, considering Zvezda is a Russian company, and they should know better. Of course, their Russian set suffered the same disproportion. 

They also inexplicably give you nine of the marching pose per box. Most everything else is in 6s, which works great for my 12 figure units. Nine, not so much.

Combining the pikes with the marching pose, however, does give me two 12 figure units, with 25% pikes per unit. That works for me, although the remainder of the unit will be pike free for the time being.

Unlike the Russians, who still need their officers and standards painted, I'll be priming these by hand and painting them in small batches and including the officers early on. I intend to mix cavalry and artillery for both sides in between the completion of every 2 units, with the intent of being able to field very small engagements, with 1/2 size units (6 figures) using some variation of Bob Cordery's various grid-based rules, or using as 1:1 for various skirmish rules for 18th century.

Saturday, August 17, 2013

WWII PTO : Defend Against a Raid

Watching Ken Burns's The War has been giving me the itch to play more wargames and I had some time Friday night, so I grabbed my old cloth, threw it over the table and then randomly generated the terrain using the rules from War Against Japan.

For the actual game I used Disposable Heroes & Coffin for Seven Brothers, but I've been thinking part of the problem with any platoon sized game at 1:1 is moving the figures can take up precious game time. 

The obvious answer was multi-figure bases. So I used some cheap DIY movement "trays" (craft foam glued to cereal box) with 2 figures to a base. 

Voila, 1/2 as much to move!

For my force, I decided to use the Early War Marines (as detailed in Red Sun, Red Death) - treating the game as taking place in '42.

The scenario I rolled was Defend Against a Raid and was generated using Platoon Forward. The Japanese were on the attack and my Marines were dug in and defending an observation post. Only 1 squad would be on the board with a 2nd squad available as reinforcements.

The Japanese were to capture a prisoner. Odd, I though, given the "no quarter given" nature of the Pacific, but, OK. 

Tactical decisions for the Japanese were handled by Platoon Forward's "All Knowing Odds Table" which is like a simpler version of Mythic GME using just 1d10 and no Chaos factor.

Since I use a card activation instead of the rules-as-written initiative for DHC7B, as suggested by Platoon Forward I added an event card (when drawn, roll a d6, 6=event, then roll on appropriate tables in Platoon Forward).

The setup:
My squad set up on the hill, per the scenario description. 

My BAR team is top most, sarge and the rifle team is in the foreground. 

The Japanese started out represented by four Type A blinds (infantry) and 1 Type B (support weapons). They would not be revealed until they shot,  even if they moved  into the open.


The Game:

There wasn't much (any) movement on my part, save for being forced to Fall Back and then advancing to the original position. 

During turn 1, four A blinds were revealed, two were nothing, one was an LMG team, and one was this:


an entire squad plus their platoon commander.

In Turn 2, the B blind turned out to be an HMG team and the Japanese began their attempted assault on my position.


[here the pictures stop. They were breaking my flow and I was really getting into the game]

The LMG and HMG did a number on my squad but we still managed to force the Japanese to fall back.

Multiple times I contemplated getting my squad off the table and conceding the game to the Japanese, especially since my reinforcements seemed to be AWOL.

But the dice gods decided to grant me some favor and, suddenly, I was cutting down the Japanese, nearly entirely eliminating that once imposing full squad. 

So each turn, I'd tell myself, "just one more and then we'll fall back if the reinforcements don't show."  I wanted my men to put up a good fight, but I didn't want to see them massacred. Even if this wasn't a campaign game, I didn't want to lead them total destruction.

But I got greedy. I wanted to win, not just escape.

Their HMG and LMG managed to eliminate Sarge and the rifle team and then, to my surprise, the LMG team decided to advance, with the HMG providing covering fire and pins.

Activation went their way for several turns in a row and the Japanese charged into close combat, at which point it was clear that the dice gods had decided to abandon me.

Outnumbered 4 to 3 (the bar team suffered a wound back in Turn 1), I thought I had a chance still. Especially when, after the Japanese finished their portion of the round of melee, I only suffered 1 loss. My attacks missed their mark entirely though, and on the Japanese 2nd attempt, they scored 3 wounds. 

I counted this as taking 3 prisoners. It took 9 turns, but they achieved their objective and won the game and I spent the rest of the evening replaying the game in my head.

I should have gotten those boys out of there. I should have learned the rules for artillery fire and taken advantage of the fact that the odds were high that i'd have arty support. 

But I was lazy, and then I got caught up in the thrill of combat, and those boys paid for it.

Tuesday, June 18, 2013

Save a Dead Tree: War Against Japan

I've been playing small test situations with Two Hour Wargames's (THW) Nuts! 2.0 and the War Against Japan (WAJ) supplement. The former I have used often enough, but the latter has languished in my book case until recently. 


Last night, I had a chance to set up and try an assault landing.

It was to be the start of a campaign, but due to a restless toddler who refused to sleep, my time to play was greatly truncated and the game didn't get very far before having to be torn down for the night.


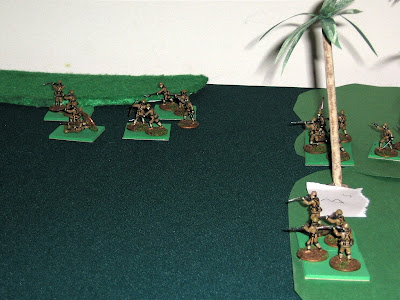
I rolled Palm trees/Scrub for the dominant terrain type. This was somewhat unfortunate as it meant line of sight would extend unimpeded across the table (although it does provide cover and concealment:


The layout

I had a reenforced platoon consisting of :

  • Platoon HQ
  • Squad 1
  • Squad 2
  • Squad 3
  • Squad 4 (on loan for this mission)
  • Flamethrower (on loan) whom I attached to my HQ squad.


Enemy Activity Level was 3, my support level was 4.

I decided to send Squad 4 onto the beach first, and then diced for which section. The entered in section 1.


4th Squad takes to the beach.
To their front, upper left in the picture, you can see some coins I use for what are essentially random/hidden force markers. All of them resolved to nothing.

1st squad hit the beach in section 3 and found themselves opposite 4 markers, which resolved into two groups of infantry (13 figures total). The second group had an LMG. Fantastic.

And then passed 2d6 on their In Sight test. Great.


The results were horrific. The squad was decimated. 80% casualties and 20% wounded.

The rest of my force landed with little incident, thankfully.

Unfortunately, I ended up calling the game after 2 turns (that's how little time i had). 

Here's my right and part of my center - which also took fire, but was only forced to duck back (drop prone in this case):


On my left and the remainder of center things were going a better - the rest of 2 ,and all of 3 and 4 had made it up to the tree line, although Squads 3 and 4 were bunching up, since 4 had to work its way around the inlet.


I really don't feel capable of calling victory or defeat at this point. 

With an Enemy Activity Level of 3, it's a good bet a number of the remaining enemy markers would resolve to nothing. So, i plan to set it up again on Wednesday night and give it a go.

Thoughts about WAJ:

  • There are a lot of special rules for handling the Japanese and all of them feel "right" to me, as do the modified reaction tables for all forces in the Pacific.
  • The beach assault clearly has potential to be devastating to your force - which, to my understanding, is how it should be.
  • The tactics tables for the Japanese, as well as having a specified target preference order, helps take Japanese control further out of the solo player's hands.
  • I do have some questions, which is typical when playing a Two Hour Wargames title - mostly pertaining to LOS and resolution of those force markers.

Nuts! 2.0 is most often my choice for small 1:1 skirmishes (up to platoon) WWII gaming. Although I may use other  rules now and then, and even make my own, I always find myself trying to incorporate the THW reaction mechanisms into them. So my decision to use Nuts/WAJ should be viewed in that light.

Disposable Heroes covers the same sized conflict but feels very different, as I noted previously. I enjoyed them, but I wasn't overly excited by them.

 Nuts! feels like there's a lot happening, control is often wrested from you when things go south, and shooting is far bloodier, where DH feels a bit less frenetic (more like chess), gives you greater ability to coordinate complex plans (again, chess), and  shooting tends to pin, not kill. 

Both games suffer from status marker-itis, although Nuts! far more. I developed a tracking sheet for use with THW's CR3:FV but it is useless in a game with as many figures as this.

Of the two systems, Disposable Heroes seems to be far easier to learn and, I suspect,  teach someone else. But, once you grok the reaction mechanisms, THW games tend to be, in my opinion, a bit more exciting.

Friday, May 31, 2013

Great Northern War Russian Infantry Complete! (sort of)

Last night, I finished the Semenovski unit and that completes the infantry - sans basing, officers and the 6 grenadiers that I have. Here are some mediocre pictures of them (I really ought to work on my photography a bit):


 This represents two boxes of Zvezda's Infantry of Peter the Great. You'll no doubt notice a paltry number of pikes for an army that continued to use them longer than their European counterparts. By the way, the Swedish box has the same issue.


So, for now my units will be very unhistorical without any pikes at all - save one unit that will be made of 50% pikes, also unhistorical.


I'm torn on picking up some Irregular Miniatures 25mm pikes (the Irregular Minis seem to play nice with Zvezda), the Strelets box with tons of pikes (although the figures look chunky compared to Zvezda), or buy more Zvezda boxes.


 For now, I'm not worrying about it - I'll wait (so I tell myself) until I figure out whether or not it bothers me in an actual game. Which, given that I have the same number of Swedes to paint, plus horse and gun for both sides, won't be for some time yet.

Tuesday, May 28, 2013

The Long Weekend

While I was out and about Saturday picking up some maintenance items for my car, I swung by the library for their Memorial Day weekend book sale and to drop off some books. I had only intended to buy books for Young Lord Shadowmoss, but as these things invariably go, I purchased yet another 4 items for my own reading pile:

  • Split Infinity by Piers Anthony
  • Prostho Plus by Piers Anthony (best setup ever: "Will a mild-mannered dentist from Earth be able to make it in the high-powered politics of galactic dentistry?")
  • Neuromancer by William Gibson 
  • No Bended Knee: The Battle for Guadalcanal: The memoir of Gen. Merrill B. Twining, USMC (Ret.)

As recompense for this tomfoolery, the universe deemed it necessary for me to slice my knee open on my way inside after mowing the lawn that afternoon. To explain exactly how this happened would be too complicated, but it involves a two car garage, a ladder, the garage door track, and thinking about what I was going to do, not what I was doing. The end result was 3 hours sitting around at urgent care in order to get 6 stitches.

In other, not unrelated news, in addition to watching war movies galore, I got a lot of painting done this weekend - my Soviet rifle squad is done, I'm nearly finished with the Semonovsky unit (a 12-figure battalion) for the Great Northern War and I started work on 4 more Soviets and 3 more Germans.

I also managed to squeeze in learning games of Iron Ivan's Disposable Heroes/Coffin for Seven Brothers, using my newly painted Soviets and Germans, and David Newport's "Tactical Combat" (available for free on the Lone Warrior site. Scroll down and look for 'Tactical Combat' WWII Rules), with my PTO collection.

Here's a blurry cell phone pic from the latter(turn 1 i think):


The stands represent sections, the individual figures are platoon HQ, and the individual in the center bottom is the company HQ. Ratio of figures to men is 1:3 in this case, but the figure count is irrelevant. You could got 1:1 or 1:5 (which i probably what I'll do in 1/32) or 1:10 (for battalion level games where each stand is a company).

I sent 1 company of USMC against 2 HMG teams and 2 rifle sections of Japanese in dug in positions guarding a cleared trail/road. The optional HMG rules - ignore long range penalty and roll 2 dice/choose the best result -make them pretty powerful. Although my marines won the day, we took around 30% casualties to clear those two positions.

As Lady and Younglord Shadowmoss are visiting her mother, tonight I will have ample time to paint and game, and plan to do just that, including working on the Semonvsky unit, and getting back into the Ever Expanding Dungeon (I haven't gone in there all month!).

Wednesday, May 8, 2013

There's Foam in That Thar Hill!

Inspired by an article on the rarely-if-ever-updated TerraGenesis, I decided to make a hill out of a scrap of open-cell furniture foam left over from an aborted attempt at building my own figure carrying cases (I now use divided plastic boxes - once i accepted the reality that I don't travel with my figures it was a no-brainer to ditch the foam).

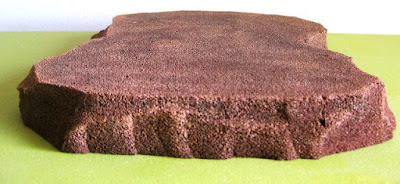
First I hacked the shape using a pair of scissors and then painted the whole thing with CeramCoat Dark Brown. I had gotten a bad bottle which I finally abandoned all attempts at using, but had yet to throw away, and figured this was as good a use as any. It pretty much kicked the bottle.

Painting foam < > Easy.

I used a large brush, itself made of foam, to "push" the paint into the furniture foam.


I then dry brushed with another unused color  in my pile, Americana Cocoa. I think i bought it as a potential color for my WWII Japanese, but ended up using Folk Art's Rusty Pipe instead. In any case, I found I couldn't actually dry brush the foam and instead painted it on where I wanted it.

Since the foam absorbs paint, there was no worry it'd go on too heavily.


What appears to be coarse texture, by the way, is the foam itself. Which you can see better here:


Of course, a brown step-hill looks kind of like a mesa of some sort. I couldn't decide how I wanted to handle the top - painting it the color of my game board seemed logical, except, the table is decidedly "old school" in color and the hill leans a bit more towards the "model train" approach ("leans", not "is").

I dug out some felt, traced the top of the hill, trimmed it up a bit and voila!


*EDIT: The felt is not permanently affixed.  Thus, I can use the hill in multiple environments.

Here's some troops up on the hill:


It's unlikely this hill would see use in GNW-era battles but you never know.
I am rather pleased with the result, although the hill cover, for when I want it to represent a grassy hill, might better work if I simply painted a piece of felt with the same paint as my tabletop.

My favorite part is that it can be squashed to no ill effect. 

I can fold, bend, twist and otherwise contort the hill without fear of damage, meaning that storage of several foam hills in a space smaller than required for the same number of rigid hills is a good possibility.

It's also available in 3" and 4" thicknesses, which would work quite well with my 1/32 WWII games.

That said, for my horse and musket games, I'd really like the hills to have a clean cut edge - the rocky look is fine for WWII / Sci-Fi / Colonial but not what I am aiming for with my GNW project. I intend to pick up some more foam to see if using a knife gives the desired look.

Friday, May 3, 2013

WWII Germans and Rainbow-Brite?

Where I work, this time of year is chaos, and it lasts until mid-July. Consequently, I've had virtually no time to game this week. 

Neither The Ever Expanding Dungeon (Labyrinth Lord) or the Mission on Mithril (Classic Traveller) saw any progress. Even Zorkon had to stay out of Stone Hell (Labyrinth Lord) this week, although that was thanks to Young Lord Shadowmoss. The only time I had, I ran Session 4 of my USR Wastelands game, and frankly, I feel rather "meh" about the session.

But, don't cry for me, Argentina!

Normally, I ride my skateboard on my lunch break (I'm 41 going on 17), but the weather has been working against me on that front. Ordinarily, this would bum me out, but, on the positive, it has meant that lunch has become my hobby time.

In the past, I've run some *very quick* dungeon crawls on my lunch breaks (using USR and Risus, and they were quick because I TPK'd so quickly), as well as broken out some wargames. This week, it's been painting.

I'm not sure what possessed me to start painting my 1/32 WWII figures when there are piles of other figures in the queue ahead of them. But, what a pleasant change of pace it is to not need to wear my magnifying goggles to paint!


The Blue M&M says "Hey, how YOU doin'?"
They aren't quite finished but they do paint a good deal faster than the smaller figures, I find. It's far easier to avoid painting over previously painted areas than it is with the smaller scales, so touch-ups are minimized. I'm still only shooting for "wargame standard" and I have no intent on doing anything fancy here, in spite of the fact that the folds in the uniforms beg for some highlighting/shading.

The book they are standing on, The Art of Warfare in the Age of Marlborough has me fired up to finish my guard unit for the GNW Russians, the Semenovski  Regiment aka The Rainbow-Brites of Imperial Russia:


Seriously.
Apparently the person in charge of their color scheme was a 4 year old. Despite, their ugliness, I'm inclined to finish the whole unit this way - solely because I love the light blue coat.

Wednesday, March 27, 2013

Kievski Regiment aka Proof I Still Paint Minis

Well, they aren't my best work, but they look OK from a "wargame distance" (although, in the picture below, I see some spots I will touch up) - 1 AoR/AtKM battalion of Kievski Regiment:


The red is Privateer Press Khador Red, the yellow is Ceramcoat Pale Yellow.

I have one more 12 figure unit to paint, which will be a guard unit, and then 2 companies of grenadiers.

Officers and standards will wait until I get some Swedes painted up.

Friday, December 7, 2012

Newest GNW Russian Unit

Last night, I finished the first unit of Russian infantry suitable for use as Byelgorodski or Astrakhanski regiments:


The usual blurry photo apologies apply!

I'm not totally happy with my painting of the facing on the coats, but at a wargaming distance, they look fine.

The figures are 1/72 Zvezda.

As a side note, this puts me 2/3s of the way to completing my December goals. Next up is to update the card-based dungeon generator with some changes for room dimensions, and then make it into a PDF. 

Monday, November 12, 2012

USE ME WWII: Pacific Theater BatRep

Our Saturday night plans to see Lincoln were cancelled due to my prelude-to-bronchitis, so Lady Shadowmoss went to visit some friends and I stayed in, drank hot chocolate and played a wargame while wearing my pj's. Saturday nights are definitely not like they used to be!

Scenario: The Japanese are holding a ridge and the USMC want them off. There is a 10 turn limit.

OOB:

  • Japanese - 1 infantry section (10 figures) dug in, 1 MG crew (2 figs)  in pill box, 1 MG crew (2 figs) in bunker
  • USMC - 3 infantry sections (8 figures, 24 figs total, 2 of which had flame throwers, each section leader carried an SMG), 1 MG crew (2 figs)


Rules: USE ME WWII, all ranges modified x1.5 for 1/72 figures. Green markers mean "winged", any other color means "struck".

I placed the Japanese in defensive positions and randomly determined the entry points for the marines.

That big blue strip is actually a creek not a river!
The Japanese wait for their prey.

The Marines prepare for their advance.

The left advances safely in cover to engage the MG in the pillbox.

The right comes under fire from the HMG and the infantry squad on the hill.
With the pillbox MG crew eliminated, the Japanese right moves to get shot at the advancing Marines.

Marines storm the entrenched Japanese infantry under fire from the bunker MG.

The Marines' rifles make fast work of the Japanese squad.
They overrun the Japanese left with an eye towards silencing the MG in the bunker.
Meanwhile, on the Japanese right, Japanese charge to intercept and fire on the advancing USMC.
A gratuitous close-up.
After fierce hand to hand fighting on the USMC left and inside the bunker, the hill is cleared!

Total turns played: 9
Total playing time (including picture taking and re-learning the rules): 1.5 hours
Results: Japanese - 14 KIA, USMC - 6 KIA, 7 wounded (5 winged, 2 stunned)

Editor's note: I really need to do two things: 1) get a new piece of fabric for the table that photographs as green and not blue and 2)do something about all of those cat hairs stuck on the fabric and felt!