Showing posts with label Chain Reaction 3. Show all posts

Friday, July 20, 2012

The Goldielocks Saga Continues - A Chain Reaction 3 Report

The other day I needed to get a game in (it was that kind of day) and as I'm working through what I want to do with my Helvetica campaign, it seemed a better idea to break out Chain Reaction 3: Final Version from Two Hour Wargames and play the next encounter in the continuing story of Goldielocks:


EAL: 4
Scenario: Raid


With the information Goldielocks had obtained, the Resistance had been able to take the fight to Control. Good as that was, once again, there was no one available to put on Goldielocks' crew. She'd have to go in alone. Again.


She managed to approach the transmission station undetected. One deep breath and she took off for the nearest building:


Safely inside, Goldielocks contemplated the best course of action:


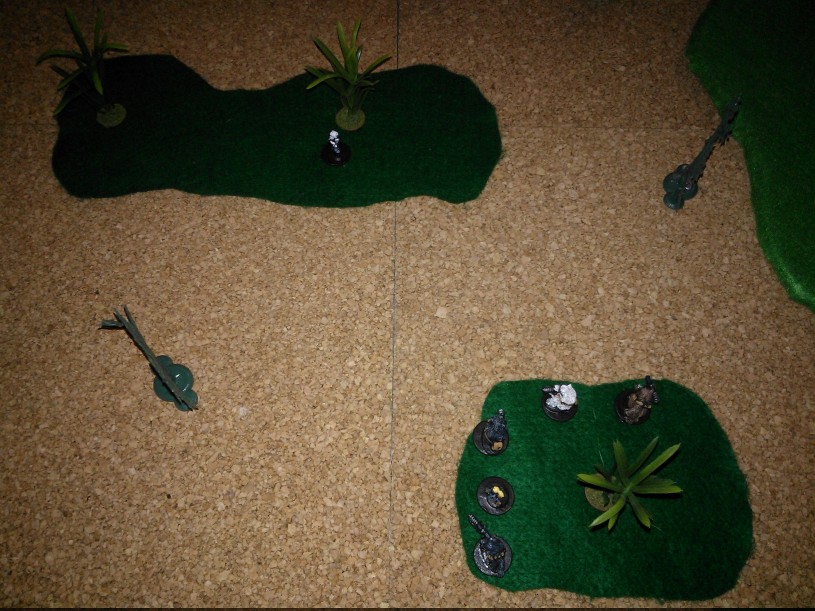
She'd approach through the woods, and head straight for the objective. No sneaking around. They'd never expect it and she'd catch them napping. Or so she thought. Once in the woods she was met by the first wrench in he plan:


The trooper was fast. Goldielocks was faster. One down.
The trooper dispatched, she was sure others had been alerted by the gun fire. As she approached the edge of the woods, she caught a flash of movement in the objective bunker. A firefight ensued  until the trooper dropped stunned:


What she didn't know or count on was a second trooper moving out the back of the bunker to try to flank her. Realizing things were going to hell in a hand-basket, Goldielocks fell back Meanwhile, on her left, the control leader advanced through the settlement:


But the hounds had gotten the scent:


Trooper #8675309 got the jump on her and after a short fire fight, Goldielocks was down:


With no Star Power dice left, she was staying down
 Will Control execute her on the spot? Will she be taken prisoner to be interrogated? Will the Resistance try to rescue her?


To be continued . . .

Thursday, June 28, 2012

The Goldielocks Invasion: A Chain Reaction 3 Report

The other night, I decided to turn the one-shot Chain Reaction 3 game I had played into the start of a mini - campaign just try out the CR3 campaign system. As I had been victorious, the next scenario per the rules was The Raid.

The setup:

Although their encounter with the Control Battalion had been successful, Goldielocks [Rep 5, Star] wasn't surprised when the Ursids departed with their scotch and cigars.They're mercenaries after all and they had another job lined up. [In other words, I failed the Stay or Go test for all four Ursids]

When the call came into command that a Control Battalion monitoring station had been located in a settlement in Sector IG-88, the resistance hadn't enough bodies to assemble a new team. Either they'd have to wait to go in - which meant that Control would have more time to gather intel - or Goldielocks would have to go it alone, get in, steal the data off of their monitoring system and get out. She chose to go it alone.


The Raid:

[EAL remained at 3 from the first encounter. One PEF was placed in the monitoring station and the other two were placed per the rules for PEFs. The first PEF was resolved when it moved out of the village into Goldielocks' line of sight. It ended up being a "Here They Come Result", and both groups were the same size as my party of 1. The first "group" is a rep 4 grunt, while the second group, in the village center, is the NPC star leader, REP 5]

I opted to just use dice for In Sight on the table instead of my Decluttering Players Aid
As the Control Battalion infantry [using the PEF Movement Table] rounded the corner, Goldielocks reacted quickly and opened up on the hapless grunt with her SMG:


"That was easy. Too easy." thought Goldielocks. She didn't have to wait long for it to get annoyingly difficult.

The Control Battalion leader [using the NP Force Movement Table] burst through the building between him and Goldielocks in order to get a clear shot at her through a window:


[The resulting shoot out was costly - both sides needed to spend Star Power to avoid being taken down]

After a heated exchange, Goldielocks took advantage of a brief lull to fall back to the woods.


PEF 2 Looms Menacingly in the Background
Figuring she could swing around the village and make her way to the monitoring station that way she moved through the woods. As she approached the edge of the woods, she cursed under her breath. "Damn it! More CB!"

[Resolved 2nd PEF. Another C result. Both groups ended up the same size as my party. Both were Rep 4 grunts. In Sights were rolled]

A hail of bullets later and the two grunts had been knocked out of the fight:

The markers say Knocked Down, but they were actually OOF
"Nighty night creeps!"

Realizing the enemy leader was still in the village, Goldielocks figured he'd be able to get plenty of shots off at her if she tried to run without going for some kind of cover. She checked her clip and took off running for one of the buildings in the village.


A spray of bullets riddled the door frame as she slammed the door shut. She thought to engage the enemy in a firefight but decided that she would be better off trying to make it to the monitoring station to put some distance between them.

To her surprise the monitoring station was empty [The PEF resolved as Nerves and the EAL went up to 4 - which has no effect this game, but will effect the next scenario]. She immediately set about downloading the contents of their server to her data pack.

Meanwhile, the Control Battalion leader made his way to the monitoring station.

He burst in on Goldielocks but she was waiting.

The exchange was brief:


Not to take any chances he'd get back on his feet [he was out of Star Power and could only get back to stunned], she opted to take him out:


As soon as the data finished transferring and she had replaced the contents of the server with garbage, she slipped out of the station to work her way back to base, a trail of bodies in her wake:


Wednesday, June 13, 2012

Goldielocks and Her Four Bears on Patrol

I had some time tonight and decided to play a quick game of Chain Reaction 3: Final Version.

I played the patrol scenario.

My "guys":

Goldielocks (Rep 5, Star, Leader, smg)
Ice (Polar bear, Rep 5, assault rifle)
Blackie (Black bear, Rep 4,assault rifle)
Brownie (Brown bear, Rep 4, assault rifle)
Asia (Asiatic Black bear, Rep 4, assault rifle)

Goldielocks and her team were sent to patrol Sector: Ben 1-9:

Enemy Activity Level was at a 3.

The first Possible Enemy Force (PEF) was just a case of nerves.

"It's OK fellas, Ben 1-9 is a sketchy place. But I'll protect ya'" teased Goldielocks.

Expecting an attack from woods to the north or the hill to the west, Goldielocks ordered the squad to fan out into position to defend from both directions.

The next PEF made its way towards Goldielocks and company:


A squad of three Control Battalion troopers (all Rep 4, all armed with assault rifles) out on patrol for resistance elements rumored to be in Ben 1-9 appeared at the wood's edge:

in-sights taken all around except Goldielocks who doesn't have LOS
Brownie locked on the trooper opposite him and blasted away.

"OD baby," growled the brown Ursid, partly boasting partly just stating fact.

Ice accepted the challenge and fired on the middle trooper, knocking him out of the fight:

Blackie and the remaining trooper engaged in a back and forth firefight that lasted quite awhile with neither side gaining the edge. Finally, Blackie scored a hit that dropped the trooper (out of fight)


Unfortunately, the trooper kept his cool during the hail of gun fire and caught Blackie looking:


Goldielocks moved on to scout the next section while the rest of the squad took out the two knocked down troopers.

The third and final PEF entered the woods and turned out to be nothing.

Goldielocks and the bears finished their patrol - victory for the resistance!

"Brothers Grimm, this is Goldielocks. The porridge is just right but we've got a bed that's too soft"

"Roger that Goldielocks. The Pumpkin Coach is on its way with a fairy godmother for the bed."

Friday, June 1, 2012

A Chain Reaction 3: Final Version Helvetica Campaign Side-game

I decided that the last campaign battle was merely the end of the day since Sauvignon-Blanc held both their fort and the town with nearly two full strength imperial units and their mechanized steam walker providing artillery support.

When night had fallen, the Riesling steam tractor was abandoned on the field. Dietrich, rather than allow the technology fall into enemy hands, ordered that a squad, under cover of darkness (which was difficult given the full moon and fires blazing around the battle field and town - a narrative justification for forgetting to implement any limits on LOS), make their way to the steam tractor and destroy it.
A team was assembled, consisting of 2 soldiers - Pvt. Otto (Rep 5), 2nd Lt. Neuman, (Leader, Rep 5), 2 lizard warriors (Rep 3 and Rep 5), Engineer (Rep 4). The Pvt has a rifle, the 2nd lt and Engineer each have pistols, and the lizard warriors are armed w/melee weapons.

Objective: Reach the tractor, set up explosives (it takes two turns), blow up the tractor (it goes off two turns after the explosives are set) and get out.

I decided I would run the Sauvignon-Blanc side using the Possible Enemy Force (PEF) rules.

I rolled an Enemy Activity Level (EAL) of 4 and diced for PEF placement.


Arrows are my friends.
The figures in the above picture show the initial PEF placement, while the arrows show the overall direction of movement for the PEFs and my Riesling squad. 

The first PEF to resolve was the one coming through the woods in the middle of the board. I rolled against the EAL and ended up facing a force the same size as my own - only they were four REP 4s and one REP 5. I had been worried about the REP 3 lizard warrior being a weak spot, and I was right. He was dead after in-sights had been resolved.

Fortunately, my REP 5 leader, REP 5 Pvt. and REP 5 lizard man made fast work of the enemy - 2 out of fight, 1 OD and 2 run aways resulting from failed cohesion tests resulting from their leader's Out of Fight.


I won activation on the next turn, and sent my team dashing across the gap between the wooded areas which forced a LOS resolution of the next PEF. Once again, party equal to mine in size - which resulted in four REP 4s on the table.


The dash across the gap - exposing my squad like a naked flesh eating man on the side of a freeway.
The in-sights resolved favorably for Sauvignon-Blanc - two of the three with LOS would resolve before my first would.


In the open, without an ounce of cover, even fast moving targets are easy kills:


Remember kids, if you gamble, you can lose.

The second shooter knocked down my leader! (stunned thankfully):


Reaper=of-His-Enemies-Souls just shakes his head and thinks "Seriously guys?" (roughly translated from lizard speak)


This was not going how I planned.

I finished the engineer's activation with him setting the first charge.

The enemy activated and I used the NP Force Movement Table. Since they don't quite yet outnumber my side 2-to-1, I roll on the Otherwise column and get "Remain in cover or move to nearest cover. May fire at enemy if in range after reaching cover." Interesting choice, but I dutifully moved them towards the woods.

The next activation, they rolled a 6 - which meant they were going to stand still. My lizard warrior made the dash across the gap to join the engineer, who set the 2nd charge.


Those silvery things are to show that two explosive charges have been set and not that the tractor has laid eggs.
I rolled activation again and they got another 6! The engineer and lizard warrior took off running and the 2nd Lt. got up and started moving too.


Rolling again, I won activation 3 to 2, and I sent my guys running towards their base edge entry point. The Sauvignon-Blanc squad rolled again on the NP Force Movement table, and scored the same result as before. They advanced through the cover, but they didn't make it all the way out when on the next turn:


How very Batman.


Objective accomplished!


****
In addition to removing the disabled steam tractor from the battlefield,  the results of this encounter will cause Sauvignon-Blanc to lose one figure from one of their two imperial units (I'm planning on using G.A.S.L.I.G.H.T. for the next big battle).


All statuses, in-sight scores, and reactions forced by in-sight were tracked using my custom CR3:FV player aid (seen at the bottom of this post) with the help of some counters I downloaded from the THW Yahoo! group.


From start to finish this game took an hour - primarily because I had to read the PEF rules as I went, and I had to re-read how to do melee. I think next time it will go faster - provided I play before I forget the PEF rules again.


The only issue I had was deciding which cover was nearer to the 2nd Sauvignon-Blanc group. At the time, I didn't think of the tractor as cover properly speaking, and so chose the woods.  Had they moved to the tractor, the second roll that indicated they would move to nearest cover or stay in cover might have either left them right next to the exploding tractor or at best maybe getting off a shot at the running Riesling squad before being hit by debris.


Overall, a fun game and totally appropriate to post it today - the last day to enter the Two Hour Wargames Give-Away Contest!


Tuesday, March 6, 2012

Campaign Week 3: The Adventures of Soldat Vendredi

The Setup

Utilizing a simple scouting game from Lone Warrior #167, "Indian Scout Game", with some modifications for my setting as detailed previously, I set out to see if Soldat Vendredi and his guide, He-who-eats-the-eyes-of-his-enemy could get back to Baudrillard with intel in time to be of use before the next battle.

The game uses a simple board game type path from point A (in my case, his location while scouting/spying on the forces of Riesling) to point B (a Sauvingnon-Blanc fort) using 1d6 to determine how many spaces to advance. Each space contains a number from 1 to 11 that corresponds to an encounter table. Given the weather for the week is stormy, I reduced all rolls by 1 (thus it's possible he'd be stuck in the same square for more than one turn).

I decided that if Vendredi can get to the fort in less than 4 rolls, Baudrillard will gain a significant advantage: either 1d3 field works in addition to any fortification or the opportunity to spring an ambush on the Riesling force, if he should be so inclined. Six or less and he gets a free roll on a random event table that negatively impacts the Riesling army. Ten or less and no benefit or penalty. More than ten and Baudrillard is himself caught off guard - and I came up with a simple table of possible penalties.

The Game

The weather has gone from bad to worse. The ground gives way beneath my boots, takes hold of them and only relinquishes after a struggle which I lose as often as I win. I volunteer for scouting missions to get away from the drills and the forced marches. When the rain falls like this, I do not know which is worse: to be miserable in camp or to be miserable on my stomach in the mud alongside one of the native intelligent "lizard-men." My companion such as he is, has the most horrifying name, He-who-eats-the-eyes-of-his-enemy. I can not stress how glad I am that he is on our side.
-excerpt from the diary of Renault Vendredi, Helvetica, 1889
***
Turn 1 - I land on a possible encounter with an enemy patrol of 2+ 2d6 enemies. I roll to see if they spot our heros.
Today we were nearly discovered by a Riesling patrol. Tense moments passed and I held my breath. My finger never left the trigger of my rifle. A torrential downpour afforded us the opportunity to slip past their watch undetected.

***
Turn 2 - Another encounter. This time there is no possibility of avoiding combat. I roll on the encounter table I generated and get mantis-men. Since these are recently painted, I'm rather glad of it! I'm using the free Chain Reaction: Final Version from Two Hour Wargames. Our heroes are both Rep 5, Soldat Vendredi is the leader and star. There are 3 mantis-men and I roll for their Reps using the rule book - all are Rep 4.

As we made our way back to our fellows, we were set upon by three savage humanoid mantis creatures crashing out of the forest behind us:
Ambush!

Here I used my old copy of Six Gun Sound to devise a mechanism determine how far away the mantis-men started. I rolled 1d6 * 3" and then placed them with die rolls. One of them started in sight and so I decided he, Vendredi and He-who...(the problem with such a name is that typing it takes too much effort) would all take in-sight tests.

There is no love lost between the lizard folk and the mantis creatures. My companion growled viciously, set his spear and charged the first visible:

Our heroes

He-who... scored highest with 4 successes, Vendredi 3 and the mantis 2. He-who... rolled on the grunt table and passed. Lacking any means of firing, he charged.

The mantis-men showed no fear however - a feeling of which they are incapable!
The villains! boo! hiss!

I advanced the lizard-man to within 6" of the mantis, stopped and checked both the mantis and lizard man on the charge table. They tied and thus the lizard moved up to melee. In so doing, he triggered an in-sight test for one of the hidden mantis (the one not in the woods) who passed 1 success - so he will get his turn when the in-sights tick down to the 1s. The melee was quick - the mantis ended up stunned.


As a star, Vendredi can do as he likes and I opt to have him hold where he is.


The remaining mantis with an in-sight success rolls on the grunt actions and charges, only to be knocked down stunned as well. 


I roll activation - the mantis win with a 6, but they can't act as none of them are a Rep 6. Vendredi advances with a fast move and He-who auto kills the second stunned mantis.


Activation again and the mantis roll another 6! He-who auto kills the first stunned mantis.


Vendredi takes his own sweet time advancing.


Activation again, He-Who enters the woods and the mantis charges him. The results are pictured below.
He-who-eats-the-eyes-of-his-enemy tore into the mantis with savage fury. There was nothing left for me to do! By himself, he killed them all. A terrifying but welcome fact!
Behold the carnage!
Turn 4 - our heroes advance but no encounter or incident.

Turn 5 - Another encounter, this time friendly.
Today we encountered a friendly patrol of lizard folk in alliance with Sauvignon-Blanc. They showed us a quicker route back to the fort. They gave us food and fresh water and we were on our way.
Turn 6 - the fort is reached without further incident.

****

After thoughts:


I don't normally include everything (setup, game and thoughts) in one post, but this was a rather short game - or would have been if I didn't have to look up the rules constantly in addition to taking pictures and notes.

The mantis men, all Rep 4, were no match for the Rep 5 lizard man - both sides got an extra d6 for melee, which essentially eliminated any advantage it might give. Poor die rolling didn't help the mantis cause- rolling 6 for activation, while higher than that rolled by my side, left them without any option other than reaction.

I enjoyed using CRFV even more this time.My "roster" worked as I hoped and kept the table clear (the skull and crossbones is something I use regularly for kills, so I don't consider it part of the clutter). Here's a picture of the roster:

My board-decluttering Roster

Dice and markers go in appropriate boxes as needed to remind me of in-sight scores, who needs to take reactions resulting from in-sight actions, as well as who is fast moving, who is ducked down, etc. I failed to include a few things however, so I need to update it before I use it again.

For a very small skirmish, such as this, I'm starting to think I could live with these rules - I didn't feel like I was rolling tons of dice, even when I was. The games go fast however, and there are times (most of the time), when I want a longer game even with only a few figures on the table. 

I am a little disappointed I didn't get more than one combat. I had hoped to evaluate the rules further. Still,I stuck with what I rolled on the scout encounter table in order to be as impartial as I can be. The result of 6 turns will give Sauvignon-Blanc some small advantage in the next battle.

Tuesday, February 28, 2012

The one where I try out Chain Reaction 3.0: Final Version

It occurred to me that while I had lamented that Chain Reaction 1.0 /Guns & Girls did not use the same mechanics as the original Six Gun Sound, I had yet to read or try the new Chain Reaction 3.0: Final Version rules from Two Hour Wargames.

Before the Game

On Sunday night, I read through the PDF. I was struck by the workbook like feel. At the end of each section there are questions and exercises that quiz you on the preceding section's main points. As I dislike rules reviews that contain the statement "I didn't try the rules but...", I diligently grabbed some figures - 1/32 Russians and Germans -  and followed along.

In my opinion, this feature makes these among the most understandable set of THW rules I've laid my hands on (excluding the 1st ed. of Six Gun Sound, which I thought was clear). I definitely needed to page through the rules during the game, and would probably still need to ask questions on the highly active Yahoo! group for unusual situations, but the basics are all here. Not to say I got it right when I played (as you'll see below, I didn't), but the exercises let me dip my toe in the water and build my enthusiasm to try the rules in an actual game.

A notable change since I last checked is the way the In-Sight test is handled and resolved. It's more clear to me now as to when to take the test and how, but I find the resolution somewhat complicated, as most other reactions are temporarily suspended during the in-sight sequence.

As with prior versions, also included are the Possible Enemy Force (PEF) rules for creating surprise in solo and cooperative games and a basic campaign structure - although there is no review exercise for these sections. There are no vehicle rules included, but I don't think anyone can complain about that. After all, for infantry only actions, you have everything you need. If you like the rules, buy one of the complete sets.

Combined with the walk through posted over on the THW blog
, I felt prepared to give it a go on Monday night.

Playing The Game

Although the rules suggest a 3' x3' playing area, I opted to go with 2' x 2' since I'm using 15mm figures and I adjusted movement and ranges accordingly.

Per the rules, I set myself up with a Star leader (Rep 5, the female zouave) and rolled up four grunts (two Rep 4 and two Rep 5) and then generated the terrain for the patrol scenario since I didn't have any particular encounter to play in mind.
Here come the co-eds!
The terrain placement rules resulted in a full but not cluttered tabletop - perfect for a small skirmish game where shooting is quick and deadly and cover is a necessity for survival.

A pleasant piece of land to take a stroll through.
 And finally, I generated an enemy activity level (EAL) of 1 and placed my 3 PEFs.


An EAL of 1 is as low as it goes, and the chances of encountering a PEF that's an enemy is just 33%. Wouldn't you know, on turn 4, I came into LOS of a PEF and rolled an encounter of a force equal in size to mine. 


Not seeing any rules as to how to determine the Reps of the enemy, I rolled on the recruitment table for each and ended up with the same distribution as my own force and then rolled the in-sight tests.

Ignoring the fact that the two Rep 5s couldn't have passed 5(they each should have lost 1 die, the enemy for moving and my sargent for the triggering figures being in cover), it's immediately apparent, that aesthetically speaking, using dice to indicate how many successes were scored for the in-sight isn't going to work for me:


The field of battle is invaded by giant dice from outer space!
The next difficulty I have is that any reactions that would result from things that happen during the In-sight tests are held until after all in-sight reactions are resolved. Maybe it's because I get minimal sleep due to Young Lord Shadowmoss going through teething and a growth spurt, but I had a good deal of trouble remembering who received fire. Man-down was easier, as I use markers to show when someone is down or Out of Fight.

Here's the table after the in-sight's and activations were resolved for Turn 4:

The wounded litter the field.
I've lost THREE of my grunts (the two Rep 4s, one wounded and one ran away, and one Rep 5, wounded) and the enemy has lost one wounded.

The enemy advances on my squad in cover (based on how I interpreted their movement roll) and a fire fight in the woods ensues. The enemy is adept at shooting, more so than I, and my star is forced to make frequent use of her star power to avoid being knocked out. 


Eventually it was just too much. At the end of turn 9 she was down to just 3 star power dice remaining and failed on all 3 - out of fight.

Two enemy dead (the peg and the counter) but it just isn't enough for our heroes to win.


Some thoughts after the game:
  • Even with group activation and reactions, I felt like I was rolling a LOT of dice. I prefer card draws to activate a side, but those days for THW are long gone. Bob Cordery's MoB uses dice for activation too, so it's not a total deal breaker, as I love that set of rules. But rolling for the in-sights and all of the other reactions, the hit, then vs. the impact to test for a kill, plus NP movement and PEF movement, and it starts to seem like that's all I'm doing, which means I feel less involved in the game.

  • I've never tried the star rules before, but I see now why I should have. In essence, they're saving throws (although some don't require any dice). While combat is quick and deadly for grunts(unless they're in cover and even then they still drop pretty fast), using the various star rules, you can keep your star going. If you're playing something less action-adventure movie and more historical, you'd probably just ignore the star rules.

  • Keeping track of who scored how many successes for in-sight with dice is too ugly, in my opinion. It works fine with just one or two figs on the board, but 5 on a side and suddenly there's a third army, a dice army, on the board. I didn't even get to the point of using markers for hunker down, duck back and the like. I think, if I decide to play again, I'll design a playing mat of sorts for handling keeping track this and tracking statuses like duck back, out of ammo, etc.
All said, I like the reaction system and using the star abilities alleviates some of my objections from previous editions (I can see even having multiple stars on one side). If I could just get over rolling dice so often, and design a way to keep track of all of the statuses off table (a roster system of sorts), I might even consider buying Nuts! or 5150.