

I decided to go with the distribution of my force as rolled and attack in force on my right, while sending a diversionary force to my left. My primary goal was not to capture either objective but to force morale checks for Duchamp's poorly rated native units to drive them from the field. If I captured either the fort or the town, that would be gravy.
Duchamp's plan was not pre-determined but was generated using a Solo DBA engine that I managed to find somewhere on the web. The rules (guidelines really) state to roll each bound for the Non-player General (NPG) to determine their battle plan for that bound. Since I don't know what constitutes a bound in DBA, I decided I'd roll for each unit card.
In any case, the Solo DBA engine provided what i would consider a reasonable result overall. It does require player interpretation -the engine provides a list of possible actions in order of priority, but the player has to evaluate the possibility of implementing a particular action on the NPG's half.
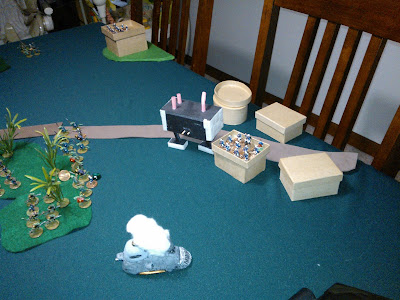
Here is the general movement taken by the troops on both sides:
 |
| My obsession with arrows continues! |
Because of the rain, neither side made much progress in the first 3 turns, although I did send the steam tractor up to position itself to lay down fire on the Sauvingon-Blanc forces gathering in and around the town.
Unfortunatey it was a gamble that I lost - on turn 4 the Sauvignon-Blanc walker activated first and fired scoring a hit which knocked the treads off the steam tractor. Since it couldn't move, it couldn't pivot to bring it's rear-facing cannon to bear. I ruled that the 2 of the four crew could fire out of each window with their rifles and while they would score a hit or two later, the cannon was out of the game as it pointed back towards my own baseline.
At the same time, the Riesling hero, Herr Lowenbraugh met his maker in close combat.
 |
| The disabled steam tractor in the foreground. Her crew bravely stayed aboard to offer rifle fire whenever a target presented itself. |
Things tooked grim - without the tractor's cannon, assaulting 2e Companie which had taken up a fortified position in the town, would be difficult and expose the Riesling 6th Kompanie to fire from both 2e Companie and the walker's cannon.
G.A.S.L.I.G.H.T.'s close combat rules make it possible for both sides to lose a figure, so units can evaporate pretty quickly. Close combat turned out to be the game changer.
In the center, as a result of close combat, a forced morale check sent members of 3e Goum scattering - including several regulars which went off the table.
 | ||||
| Remnants of a Sauvignon-Blanc Guam scatter as they fail their morale test. |
The scrum on the left was a violent affair:

Monsieur Jones (Hero) is felled in hand to hand despite his impressive Scuffle value (15):

The 1er Goum was utterly destroyed in the melee:
 |
| 1er Companie looks on - they can hear the sounds of battle in the woods, but their rifle fire can not penetrate into the tangled trees. |
The center is cleared - 2e Goum also evaporated - and the right flank, composed of Riesling's native 13th Kompanie, advances under fire:

At the end of turn 6 the game was over according to my victory conditions - Sauvignon-Blanc had lost all three native units and their hero, to Riesling's loss of their hero and immobilization of the steam tractor.
While I had won, I wasn't sure this should be the case - after all, Sauvignon-Blanc still had their leader, and both 1er Companie, which had taken one hit from the rifle armed crew in the disabled tractor) in the fort and 2e Companie, plus the walker in good defensive positions in the town.. If the battle had continued they would have fared well and it would have been Riesling that would have had to quit the field (a continuation of the game as a "what if" confirmed this).
Still, the more I thought it over, the more I felt like, while Sauvignon-Blanc could recover some of their losses using the campaign rules and maybe press on to another battle they would undoubtedly be outnumbered. Riesling had lost only their hero while all of the units were at least half strength or more - and perhaps more problematic, Duchamp would have to maintain order among a lizard folk populace angry over the use of their own as shields for the imperials in their battle for land which according to the lizard folk way of thinking, doesn't belong to them anyway - it would become a two front war.
So where does that leave me?
 |
| And more importantly, where does it leave Dietrich? |
I see a couple of possibilities. In no particular order:
- End the campaign - Duchamp surrenders rather than risk his troops further.
- Suavignon-Blanc lost the day, but night has fallen and the battle can continue in the morning - both sides get to test for the return of 1/2 of their losses.
- Declare that Dietrich orders Riesling to quit the field to draw out Duchamp's army into a field battle where they will not have protection of the stone walls of the fort or town. There may or may not be a lizard folk uprising for Duchamp to deal with.
- Riesling has managed to bring up several artillery crews for the sake of conducting a siege on both the fort and the town (using siege rules from an issue of Lone Warrior). This could spill into a small naval battle (mind you, I have no miniatures for this) to blockade the port.
- Riesling wins, but now they have to deal with the angry lizard folk in the former Sauvignon-Blanc controlled region.
- Dietrich withdraws to draw out Duchamp. Meanwhile a naval blockade/siege begins on the town.
I may leave this to the roll of a die, but if anyone has any suggestions on how they would handle it, I'm open to ideas.
No comments:
Post a Comment
Note: Only a member of this blog may post a comment.