Saturday, March 31, 2012

How are you doing with your 2012 goals?

A lot of us started 2012 bright-eyed and full of wonder and anticipation. Giddy with the blank slate ahead of us, we made all sorts of promises to ourselves (aka goals)- some realistic and some pie-in-the-sky.

Well, here we are, 25% of the year is gone and it's time to assess how we're doing before it gets too late to do anything about it. 
 
Me?
 
2012 Goals Recap

I had 3 main goals that I posted about back in December:
  • Weekly painting/terrain making/scenery construction/etc.
  • Monthly solo gaming
  • 100 posts to this blog
 and three bigger projects I hoped to complete:
  • 1/72 WWII Pacific Island Assault
  • 54mm 1/72 Morschauser Horse and Musket
  • 2mm Napoleonics
Assessment

Overall I feel pretty good about my progress - my imagi-nation campaign on the fictitious island of Helvetica has provided more than ample fodder for contemplating rules, campaign and solo mechanisms and constructing terrain and scenery.

I've fought a number of solo battles - both for my campaign and one-offs.


I've also squeezed in a decent amount of painting  including 48 figures for the 1/72 WWII Pacific Island Assault.


And of course, all of the above has provided me with blog posts to the tune of 40% of my 100 post goal.

Changes?

I may not attempt the 2mm project this year. It's tempting for playing games in limited space at work, but the Morschauser project featuring the Great Northern War is going to require substantial painting effort - 8 boxes of figures in total. Never mind that the USMC and armor for the Pacific Theater have yet to be started (I don't even own the armor yet!).

April's Goals
  • Prepare, prime and start painting the USMC - I'd like at least 15-20 done, with an eye towards finishing them by the end of May
  • Game at least 1x
  • Write 2 entries a week.

So, how are you doing with your goals?

Pumpkin wants to know.

Ambush at the Hills of Cordon Bleu:Campaign Week 5

Turn 0
Sauvignon-Blanc, under the command of Colonel Guillaume Deauxtrieve, sends out a rear guard to cover the retreat of the main body of troops under Colonel Baudrillard.

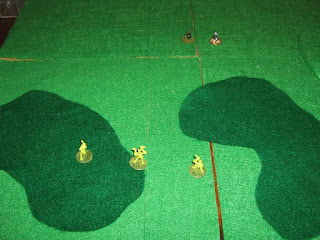
Staring out across the plain to the foot hills known as Cordon Bleu

Turns 1 -  3

Given the scarce amount of cover, the lone lizard tracker advanced towards the small grove of trees on the right flank. Section 3 under Deauxtrieve advanced between the grove and the central hill, while Section 4 moved to take the hill.

The walker, in an engineering miracle, passed its sustain rolls 2 turns in a row before sputtering to stop.

Tracker-of-Shadow-Ghosts leads the advance and thinks to himself,  "It's quiet. Too quiet." (loosely translated from the local lizard folk dialect)


Turn 4

AMBUSH!

Without warning, the Riesling forces crash out of the forest (not pictured) and on to the plain.

Section 4 advances to the hill

Sergent Jeanclaude and Caporal Genevieve form Section 4 into a firing line.

His blood lust raging, Tracker-of-Shadow-Ghosts charges the Riesling left and draws first blood!

The victor will have to wait to tear the heart from his victim.

Not pictured, Deauxtrieve's section opens fire on Riesling to little effect.

Turn 5

Section 4 opens fire on the Riesling force from their vantage point atop the hill, killing Feldwebel Hegel.
Section 4, 2nd Company opening a can of moderate whoop-ass on Riesling.
Tracker-of-Shadow-Ghosts attempts to further engage the Riesling troop as victims of his terrible onslaught but the Riesling lizard hero, Ka'raz-sekl-ka-la, senses an opportunity for his own carnage.

The ensuing melee would be unmemorable save for the fact that both heroes were killed!
 
Even in death, they are locked in struggle!
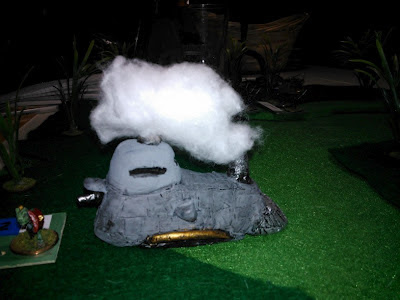
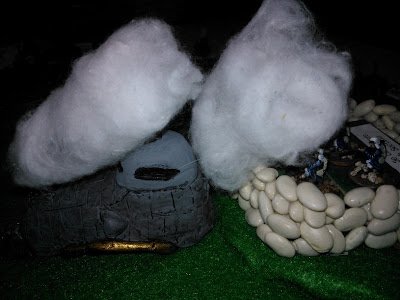
Not pictured: The steam tank, proving its engineers were not talentless hacks, passes its sustain roll and pivots 90 degrees to fire at Section 4 atop the hill scoring SIX hits, Sergent Jeanclaude among them. Msr. Jeanclaude, showing his mettle as an officer, dusts himself off, pulls the shrapnel from his overcoat and utters a curse towards his attacker.

With unwavering determination, the Riesling forces advance - Zug 23 risking themselves to provide cover for the Riesling left.
"Charge!" (also translated from lizard folk)


Turns 6 - 7


Deauxtrieve, sensing that it might be best to put some distance between his men and the approaching lizard folk melee troops, moves towards the hill.
The walker and steam tractor exchange artillery fire and both score hits. The steam tractor escapes damage - the round entering and exiting after rattling around a bit. The walker is not so lucky and the drive mechanism may be unrepairable.

As Zug 23 charges Deautrieve's section, Jeanclaude attempts to move the remnants of his force around the hill, using the walker as a shield, to flank the Riesling force:

"Single file everybody! No talking!"


Turn 8

Section 3 holds their own against Zug 23, but Zug 24 joins the fray.


The melee goes badly for Sauvignon-Blanc, but amazingly they pass morale.

I let the dice decide, "Does Deauxtrieve stay and fight or run?" He stays!

He is either courageous or a fool. Or perhaps both.

Screaming "Death or glory!", Deauxtrieve is returned to his maker.
Another Sauvignon-Blanc loss, this time under my direct leadership!

Thursday, March 29, 2012

Campaign Week 5 Background

The Setup
Following yet another loss for Sauvignon-Blanc in my imagi-nations campaign, I turned to Mythic to answer a few questions:

Does command replace Baudrillard?
I decide this is very likely but not a sure thing, given the results the last 
time I asked. I get a yes result.

Will the new commander be Bardot?
Bardot has been with Baudrillard since the start and would be the likely choice except that he's also of a defensive nature and Sauvignon-Blanc just can't afford that right now. I figure unlikely and get a no.

Will Bardot also be replaced?
I figure this is likely - out with the old in with the new and all that but I roll a no. Command reasons the men and lizard folk must have some loyalty to Bardot and wouldn't react well to his replacement in light of his not getting the promotion.

Will the new commander be aggressive?
I decide this is a near sure thing and get a yes result.


The Scenario
Lacking a suitable scenario idea for the new commander to get his feet wet, I roll on Mythic's subject and event tables and get "Ambush leadership".

Here's what I came up with:

The new commander, Colonel Guillaume Deauxtrieve, is out with a small force covering the retreat of the remaining Sauvignon-Blanc forces back to the fort at Port Guillaume Le Roy, when he is ambushed by the Riesling avant-garde.

The objective for Sauvignon-Blanc is to escort Deauxtrieve off the table, while for Riesling it's to kill him.


The Forces
As I played Riesling as my own side last time, I opted to play Sauvignon-Blanc this time.

To help guide my decisions for both sides, I used a personality generation system I downloaded from the Yahoo Solo Wargamer's group a few years ago for the individual units and for Deauxtrieve himself. Deauxtrieve, it turns out, is not only aggressive, but seeks to inflict maximum casualties on enemy forces. He may be exactly what Sauvignon-Blanc needs.

As mentioned in my last post, I wanted to do the next campaign game using G.A.S.L.I.G.H.T. This would require a reduction in the size of the forces used. I settled on 2 infantry units, 1 hero and 1 vehicle each. A die roll would determine whether a unit was lizard or human.

Sauvignon-Blanc
  • Section 3e, 2e Compagnie- - Deauxtrieve (Leader), Corporal Batonrouge (Veteran), 8 soldats
  • Section 4e, 2e Compagnie - Sergent Jean-Claude (Leader), Corporal Genevieve (Veteran), 8 soldats
  • Walker
  • Tracker-of-Shadow-Ghosts (Lizard hero)

Riesling
  • Zug 23 - Feldwebel Hegel (Leader), Gefreiter Schultz (Veteran), 8 schutzes
  • Zug 24 - Feldwebel Kimmel (Leader), Gefreiter Wilhelm (Veteran), 8 schutzes
  • Steam tractor
  • Ka'raz-sekl-ka-la (Lizard hero)

Tuesday, March 27, 2012

G.A.S.L.I.G.H.T. Cometh!

After much thought, I've decided the next game in the campaign will be a G.A.S.L.I.G.H.T. game with 2 units of infantry, 1 hero and one vehicle per side.

Why the switch?

I've been reading G.A.S.L.I.G.H.T. battle reports lately, including some of my own from a few years back that I rediscovered on my hard drive and now I'm jonesing for a game.

G.A.S.L.I.G.H.T. requires some preparation. So, tonight, I rolled up everything and now I'm ready to go whenever I get a chance!

Monday, March 26, 2012

15mm SciFi update, Victorian and Otherwise

I broke my left elbow skateboarding the other day (I'm 40, so this got me more than my fair share of raised eyebrows) and that has hindered my ability to type up my thoughts on the Conflict at Candide - not because I can't type, but because one handed typing is painfully slow. Fortunately, I can still paint.

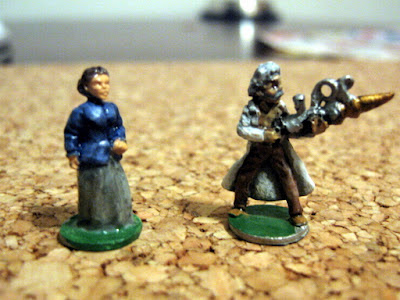
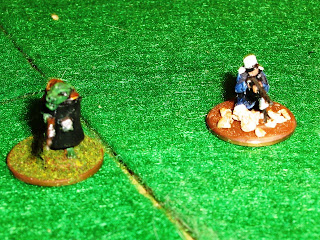
First up, the author and amateur scientist, Mark Twain. Mr. Twain is carrying his scratch-built electro-magnetic razzamataser. Also pictured, the famed occultist, Madame Ishnisanshi:
figures are from Brigade Games 15mm G.A.S.L.I.G.H.T. series
Next up, from a galaxy far, far away, a squad of Sepulvedan Control Battalion Riflethings:
Khurasan Miniatures Control Battalion Infantry Riflethings (five poses with pulse rifle)
For these minis, I used the AT-AT driver from The Empire Strikes Back as inspiration for the paint scheme. I have the command pack and plan to order the rest of the riflethings packs - some of which I intend to paint all white like the snow troopers from the same movie.

Wednesday, March 21, 2012

Conflict at Candide: The War in Pictures


Set Up:
For the narrative and opening dispositions of the opposing forces, please see my last post.
  • Sauvignon-Blanc most hold hill for 10 turns + 1d6 while minimizing losses
  • Riesling must force Sauvignon-Blanc to abandon their position while minimizing losses.

The Battle:

Turn 1:
Baudrillard orders the lizard unit to his right flank to move left to support the steam walker while the advance units spring their trap!
Ambush! (note the steam tractor which will fail to start when given the chance this turn)
Ra'zel'Krrragh'lah hisses an oath to the Warrior God of his people and raises his battle axe high as Schutze Essenbeck rethinks his decision to leave the family business to his younger brother.
The ambush could not be a better success - both Riesling units are removed from the table. Maybe things are starting to come up Baudrillard?

Not so fast. 

I manage to destroy the ambushers and I feel pretty good about it.

Turn 2:
The dice gods, sensing my bravado, knock me down a peg.

It's an even numbered turn, so I test for a random event (as described here) and, of course, get one: one lizard unit turns on a nearby unit.

Traitors

Turn 3:
Regardless of what happens after this, I am ecstatic: the steam tractor starts and then advances!

Pictures or it didn't happen.


Turn 4:
I breathe a sigh of relief when I test for a random event and roll a 4 (no event). 

To no one's surprise, least of all Baudrillard's, the steam walker opens fire at Riesling troops on the opposite hill and misses.

The tide of the battle clearly is going in Riesling's direction. Even the steam tractor miraculously passes its sustain roll and advances to fire on the walker:

The Riesling army dominates the battle field as the steam tractor spins to fire on the walker.

Two behemoths square off in what will be yet ANOTHER anti-climactic encounter.
Turn 5:

The Sauvignon-Blanc attacks are ineffectual.

My rifle troops on the hill to the left of the fort open fire and score hits - much to my surprise, given that it takes two hits to score 1 on units in cover.

But, against all precedence, it's the steam tractor that will carry the day.
Redemption: Giving up on taking out the walker, the steam tractor, which miraculously passed all of its sustain rolls, opens up on Fort Candide at close range.
Turn 6:
Not pictured: Baudrillard orders his force to abandon their positions. Riesling victory.

Game over.

***
Things are looking grim for Sauvignon-Blanc.

Will Baudrillard remain in command? Will Sauvignon-Blanc stave off the Riesling advance when they next meet? 

A little bit of book keeping and some work on the cork tiles and we'll find out!

Tuesday, March 20, 2012

Conflict at Candide: Campaign Week 4 pt1


Baudrillard, driven from the bridge over the river Qui, had led his men to the southern most outpost in Sauvignon-Blanc occupied Helvetica - the outpost referred to as "Fort Candide". Consisting of earthworks and a stone walled enclosure situated atop a hill, Fort Candide overlooks a pass to the little explored north eastern wilderness and pass to the northwest which winds down and out of the tropical and rugged interior, to the more temperate amber grasslands that run down to the Helvetica shore line.The latter offers a route to the port of Guillaume Le Roy that doesn't involve traversing mountains, and as such, the outpost holds great strategic importance.


Reinforced by the garrison at the outpost, Baudrillard sent the majority of his human troops onward toward the port, while fresh lizard folk troops were brought up to take their place. 


Bolstered by reports from scouts keeping tabs on the Riesling forces, Baudrillard set a goum of lizard folk to the task of ambushing the attackers. His steam powered walker, which performed horridly at the previous encounters, would be situated on a hill top to the south east,with a clear view to fire on any enemy approaching the fort. As the cannon may fire whether or not the steam engine and mechanical gears are working, there would be no worries about its function.


Supplies to the outpost, meanwhile, had slowed - inadequate rations, ammunition and medicine to fight tropical disease took a toll on morale and men.


Baudrillard inspiring his troops.


***


Dietrich,satisfied with the performance of the troops under his command, had become concerned about the losses being inflicted in spite of the victories. With no word if or when troops would arrive from Riesling, Dietrich opted to send the majority of his human infantry back into Riesling territory - he would, he calculated, be able to finish Sauvignon-Blanc with their allied lizard folk troop and a small number of Riesling infantry, reinforced with fresh troops, in a support role. He was aggressive in pursuit of his objectives, not wreckless.


The Sauvignon-Blanc walker also concerned him - although it had yet to exert any influence in battle, its large cannon could wreak havoc on any assault on the S-B outpost. He would need to take it out as soon as possible.


Although his supply line was now stretched somewhat - supplies remained adequate, the quartermasters working with typical Riesling clockwork efficiency. Morale remained high and as the weather cleared and with the ground drying out (as much as it ever dries in the jungle), the Riesling army marched steadfastly towards battle.


***


The battle lines are drawn!
***
I hope to have the battle written up in the next day or so. Until then!

Monday, March 19, 2012

March Goals Update

The impossible has happened.

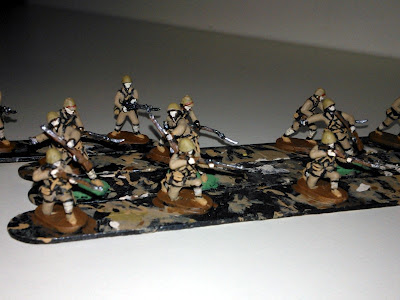
I finished the remaining twenty-four 1/72 Waterloo Japanese infantry with almost two weeks left in the month! w00t!


The establishing shot.
A close(er) up


This puts me 1/2 way towards fielding forces for Pacific island battles - one of my 3 bigger projects this year. It's also either tied with or is a close second for the largest force I've ever painted - the 1st is my lizard folk (either 48 or 50 strong, I can't recall).


I've got some Khurasan 15mm sci-fi minis primed and ready to paint. So they're probably next for completion.  In between, I'll be prepping my USMC for priming.

Wednesday, March 14, 2012

Should I Stay or Should I Go?: Some Thoughts on Morale That May or May Not Ramble Incoherently

After reading Featherstone's Advanced Wargame Ideas and Tony Bath's Ancient Wargaming: Including Setting up a Wargames Campaign, as well as several free rule sets that mention it, I've decided to reduce the morale test requirement for each force

It appears that I've been a bit too generous.

So, adjusting the levels to a more reasonable number:

  • A force led by an aggressive leader tests morale after 30% lost
  • A force led by neutral leader tests morale after 25% lost
  • A force led by a cautious leader tests morale after 20% lost


Now, there is one problem, I admit. Morale in my game is tied to the loss of strength points (in Memoir of Battle each unit has a basic strength value, but MoB has no morale rules of its own). Because the campaign rules allow for the possibility of strength points to be recovered after the battle, I have interpreted that to mean a strength point is a measure of physical health but also of elan, esprit du corps cohesion and such. MoB supports this interpretation I believe, because elite units get +1 and poor a -1 to their basic value. There is no logical necessity that a poor unit must necessarily have fewer bodies than an elite one. A lost strength point, therefore, reflects physical and/or emotional damage.

Clearly, a 20% casualty rate is different than saying, 20% of the troops have lost their will to fight or even 10% are casualties, but 10% have curled up in the fetal position, sucking their thumbs. In one case, you've lost 20% of your force for good and you may not be able to drum up fresh recruits to replace them. In the others, you still have something to work with - although you may need to do something about that thumb sucking.

In any case, I would offer that the MoB and the campaign rules I am using, are not at the "Did Pvt. Jones survive that barrage?" level but are higher up, at the "What's going on with 1st Platoon/Company A/The Queens Guard and do they have the resources to take the hill?"As such, being reduced to 80% of your strength, regardless of the means, ought to be cause for a cautious commander to rethink pushing onward.

I know that some wargamers dislike morale tests and believe it is by their will alone that forces should exit a battle, that a good player would do what is "realistic" (a loaded term if ever there was one when referring to toy soldiers, model vehicles and buidlings and dice rolling).

In some ways, I liken morale tests to alignment in D&D. As one blogger (I wish I could remember which) described it, alignment is the in-game representation of the voice of conscience. Morale is the in-game sense of the on-table commander that the losses may have reached a point where continuing is not the best course of action. Of course, alignment violations can have serious consequences in D&D, while a commander not only can stay on the field of battle after the morale test is taken, but they sometimes do if the dice fall that way, and they may even go on to win the day as a result. So it's not a perfect analogy but I think it shows how I'm viewing the morale test, at least in this campaign - more as a matter of the commander's character than an attempt to forcibly wrest control from the player.

Though it may in fact have the same result as the latter, the effect on me as the player is not "me against the system" but one of gaining some narrative insight to the commander's mind set.

Tuesday, March 13, 2012

Campaign Week 4: Preparing to Play One Side as "Mine"

To my knowledge, Chronicles of Blood (CoB), a freebie download on WargameVault, has the distinction of being one of the few sets of rules advertised as being designed specifically for solo play. Now, that said, it does not feature an incredible AI, but rather, it codifies into the rules certain techniques familiar to solo wargamers to increase suspense/tension and give advantage to the solo opponent. In this case, the rules provide some general enemy control guidelines, a fixed turn limit, and a table of negative things that can happen to you, the player, each turn depending on the results of a roll on a d4.


While CoA may not be ground breaking - I've seen all of these ideas before - they have provided me a good bit of fun. I contemplated using them wholesale with only some modifications for genre for my next campaign game, just for giggles, as they are written for regimental battles (but I use them for fantasy skirmish).  I'm going to hold off on that for now. Rather, I'll follow their example, and combined with Memoir of Battle, I'll regard one side, Riesling, as "my" side with the system weakening my ability to play favorites. This is something I do often in 1:1 skirmish games but have yet to try in a 1:many game.


Random Events to Put a Damper on My Day
adapted from Chronicles of Blood to fit my campaign/genre/rules


At the start of every other turn, roll 1d4. On a 1, roll 1d6 on the following table:
  1. Equipment failure - Vehicle breaks down, will require repair (2 turns, can be non-consecutive, of successful start rolls) OR (if I switch to traditional artillery), powder wet, had to break open new keg - no artillery for 1 + 1d2 turns.
  2. Traitors - one base of natives turns on their nearest allies and attacks them on the enemy's activation - stand is permanently lost and under control of enemy for remainder of battle. Does not get added to enemy roster for campaign purposes.
  3. Ambush - (1-3) place one enemy stand (3 strength points) if available in the grid space adjacent to one of my units to engage in melee OR (4-6)out of nowhere, archers or/javelin troops hurl their missiles and then disappear (Roll 4d6). Attack is directed against unit nearest an edge of table (dice for ties) or cover .
  4. Enemy Reinforcements - Restore the weakest enemy stand to full strength. Dice for ties.
  5. Deserters - my lowest strength stand flees the field.
  6. Miscommunication - The stand furthest from leader(s) is affected. If more than one, randomly determine by die roll.
    • 1-2 The stand moves forward full movement immediately and makes no further action on my turn - if encounters enemy in adjacent square or can't advance as result then melee ensues. if friendly stand, then takes 1 damage to reflect loss of cohesion. If goes off board then out of play remainder of game. 
    • 3-4 stand immediately retreats one full move towards baseline - if a full move would take off table then unit is out of play. If would land on grid space with another unit,takes 1 point of damage to represent loss of cohesion, if an enemy the enters melee. 
    • 5- 6 Stand takes no actions this turn but may defend itself in melee if attacked.
I'll also use the stipulations from Chronicles of Blood that the solo opponent (Sauvignon-Blanc) always gets initiative.

To better guide decisions for the enemy, I'll be using the Solo DBA Fuzzy Rules from Solo Wargamer for Sauvignon-Blanc's tactical decisions and of course either Mythic, IN-RADIC or RPG Laboratory's Story System as needed.

Friday, March 9, 2012

Irregular Goodness!

I've been wrestling with my laptop lately - Meego just wasn't reliable enough so I first tried the Windows 8 beta, but as a beta I expected issues and subsequently found them. Now I've switched to SimplyMEPIS 8.5 which I have prior experience using and I'll probably stick with it as it's stable (never mind that I spent 45 minutes last night looking up how to mount an NTFS USB harddrive using the Bash command line) - and so I haven't had much time for hobby related fun.

When I've had a moment, it's been spent struggling to paint the rising sun flags that four of the Japanese infantry figures carry. I finally completed two to what I'll call a passable war game standard (a C- at best). The remaining two, plus four radio operators are on deck for this weekend.

And finally, the reason for this post, after only a week, all the way from England, my Irregular Miniatures have arrived!

Is there anything more guilt-inducing than a pile of naked lead?
There's minis present for three new units in G.A.S.L.I.G.H.T. terms (10 warrior women and 20 dark elves from their 15mm Fantasy line), as well as several character minis(4 Western Gentlemen and the legendary Sir Harry). And, finally, 3 British infantry, some native porters and a handful of askari for Adventures in Jimland


I'm very pleased overall with these figures - although some, like the porters, are quite flash heavy.


My Khurasan order arrived yesterday evening but I didn't get a picture of it - it includes some of my favorite figures to date:

Galactic dictator and ninja (the dictator will undoubtedly be painted in colors that go with my Prussian infantry)

and

these guys! (I picture a variety of scenarios centered around Ursids trying to steal their honey)

Tuesday, March 6, 2012

Campaign Week 3: The Adventures of Soldat Vendredi

The Setup

Utilizing a simple scouting game from Lone Warrior #167, "Indian Scout Game", with some modifications for my setting as detailed previously, I set out to see if Soldat Vendredi and his guide, He-who-eats-the-eyes-of-his-enemy could get back to Baudrillard with intel in time to be of use before the next battle.

The game uses a simple board game type path from point A (in my case, his location while scouting/spying on the forces of Riesling) to point B (a Sauvingnon-Blanc fort) using 1d6 to determine how many spaces to advance. Each space contains a number from 1 to 11 that corresponds to an encounter table. Given the weather for the week is stormy, I reduced all rolls by 1 (thus it's possible he'd be stuck in the same square for more than one turn).

I decided that if Vendredi can get to the fort in less than 4 rolls, Baudrillard will gain a significant advantage: either 1d3 field works in addition to any fortification or the opportunity to spring an ambush on the Riesling force, if he should be so inclined. Six or less and he gets a free roll on a random event table that negatively impacts the Riesling army. Ten or less and no benefit or penalty. More than ten and Baudrillard is himself caught off guard - and I came up with a simple table of possible penalties.

The Game

The weather has gone from bad to worse. The ground gives way beneath my boots, takes hold of them and only relinquishes after a struggle which I lose as often as I win. I volunteer for scouting missions to get away from the drills and the forced marches. When the rain falls like this, I do not know which is worse: to be miserable in camp or to be miserable on my stomach in the mud alongside one of the native intelligent "lizard-men." My companion such as he is, has the most horrifying name, He-who-eats-the-eyes-of-his-enemy. I can not stress how glad I am that he is on our side.
-excerpt from the diary of Renault Vendredi, Helvetica, 1889
***
Turn 1 - I land on a possible encounter with an enemy patrol of 2+ 2d6 enemies. I roll to see if they spot our heros.
Today we were nearly discovered by a Riesling patrol. Tense moments passed and I held my breath. My finger never left the trigger of my rifle. A torrential downpour afforded us the opportunity to slip past their watch undetected.

***
Turn 2 - Another encounter. This time there is no possibility of avoiding combat. I roll on the encounter table I generated and get mantis-men. Since these are recently painted, I'm rather glad of it! I'm using the free Chain Reaction: Final Version from Two Hour Wargames. Our heroes are both Rep 5, Soldat Vendredi is the leader and star. There are 3 mantis-men and I roll for their Reps using the rule book - all are Rep 4.

As we made our way back to our fellows, we were set upon by three savage humanoid mantis creatures crashing out of the forest behind us:
Ambush!

Here I used my old copy of Six Gun Sound to devise a mechanism determine how far away the mantis-men started. I rolled 1d6 * 3" and then placed them with die rolls. One of them started in sight and so I decided he, Vendredi and He-who...(the problem with such a name is that typing it takes too much effort) would all take in-sight tests.

There is no love lost between the lizard folk and the mantis creatures. My companion growled viciously, set his spear and charged the first visible:

Our heroes

He-who... scored highest with 4 successes, Vendredi 3 and the mantis 2. He-who... rolled on the grunt table and passed. Lacking any means of firing, he charged.

The mantis-men showed no fear however - a feeling of which they are incapable!
The villains! boo! hiss!

I advanced the lizard-man to within 6" of the mantis, stopped and checked both the mantis and lizard man on the charge table. They tied and thus the lizard moved up to melee. In so doing, he triggered an in-sight test for one of the hidden mantis (the one not in the woods) who passed 1 success - so he will get his turn when the in-sights tick down to the 1s. The melee was quick - the mantis ended up stunned.


As a star, Vendredi can do as he likes and I opt to have him hold where he is.


The remaining mantis with an in-sight success rolls on the grunt actions and charges, only to be knocked down stunned as well. 


I roll activation - the mantis win with a 6, but they can't act as none of them are a Rep 6. Vendredi advances with a fast move and He-who auto kills the second stunned mantis.


Activation again and the mantis roll another 6! He-who auto kills the first stunned mantis.


Vendredi takes his own sweet time advancing.


Activation again, He-Who enters the woods and the mantis charges him. The results are pictured below.
He-who-eats-the-eyes-of-his-enemy tore into the mantis with savage fury. There was nothing left for me to do! By himself, he killed them all. A terrifying but welcome fact!
Behold the carnage!
Turn 4 - our heroes advance but no encounter or incident.

Turn 5 - Another encounter, this time friendly.
Today we encountered a friendly patrol of lizard folk in alliance with Sauvignon-Blanc. They showed us a quicker route back to the fort. They gave us food and fresh water and we were on our way.
Turn 6 - the fort is reached without further incident.

****

After thoughts:


I don't normally include everything (setup, game and thoughts) in one post, but this was a rather short game - or would have been if I didn't have to look up the rules constantly in addition to taking pictures and notes.

The mantis men, all Rep 4, were no match for the Rep 5 lizard man - both sides got an extra d6 for melee, which essentially eliminated any advantage it might give. Poor die rolling didn't help the mantis cause- rolling 6 for activation, while higher than that rolled by my side, left them without any option other than reaction.

I enjoyed using CRFV even more this time.My "roster" worked as I hoped and kept the table clear (the skull and crossbones is something I use regularly for kills, so I don't consider it part of the clutter). Here's a picture of the roster:

My board-decluttering Roster

Dice and markers go in appropriate boxes as needed to remind me of in-sight scores, who needs to take reactions resulting from in-sight actions, as well as who is fast moving, who is ducked down, etc. I failed to include a few things however, so I need to update it before I use it again.

For a very small skirmish, such as this, I'm starting to think I could live with these rules - I didn't feel like I was rolling tons of dice, even when I was. The games go fast however, and there are times (most of the time), when I want a longer game even with only a few figures on the table. 

I am a little disappointed I didn't get more than one combat. I had hoped to evaluate the rules further. Still,I stuck with what I rolled on the scout encounter table in order to be as impartial as I can be. The result of 6 turns will give Sauvignon-Blanc some small advantage in the next battle.

Monday, March 5, 2012

RPG Neglect

It's been awhile since I've done anything with my D&D b/x gaming - primarily this is due to my current drive to paint as many of my miniatures as I can. I figure this is probably a passing feeling and so best to make use of it while I have it. Of course, painting minis feeds my desire to wargame. And, so, RPGs take a backseat and are neglected.

However, Friday, we had friends over for game night and our second session of Exalted. Although most of the evening gave way to socializing and eating (my guacamole was a hit), we managed to squeeze in some adventuring. Frankly, I'd have been happier with more game time, but, as it was, it whet my appetite for RPGs again.

Since my last b/x session, I've been considering a variety of ways to do a solo dungeon crawl in a way that I will find appealing. The last attempt was alright, but having the map in advance just didn't feel right. What I want is random map generation but I don't want totally random encounters - I prefer some sort of theme if not to the whole dungeon then to various parts of it. I've since rediscovered my copies of H.E.X. (a one page RPG of sorts) and Chronicles of Arax, which are essentially map-less dungeon delves. Both handle encounter generation via mechanisms that add modifiers to the base die roll that accumulate turn to turn, guaranteeing, that, if your character survives, you 'll eventually battle the "big boss", find the objective and/or stairs up/down. There's something about this mechanism that I like - there's a theme, but a randomness to the order.

The D&D basic rule book has some simple steps for populating rooms that I would like to try to incorporate for a sort of double-blind approach.

Both H.E.X. and CoA use abstract combat and I prefer to play out combat with miniatures and/or counters (it's the wargamer in me), so I'll use dungeon tiles for combat purposes. Either I will develop simple dungeon mapping rules and use tiles that match, or I may eschew map making altogether and just grab whatever tile I feel is appropriate.

Finally, I may try a different set of rules next round in spite of already having my characters created and equipped in b/x.

The top two contenders:

Dungeon Raiders - a free retroclone download from WargameVault. At 10 pages, it's extremely simplified to allow you to get to hacking and slashing sooner rather than later.

Risus: The Anything RPG - for no other reason than I have wanted to play Risus for years. I'm also considering using this for sci-fi skirmish when I get to the point of having my figures ready. We'll see.

Of course, all of this will wait until I play out the scouting mission for my Helvetica campaign Week 3, which, hopefully will be tonight.

Friday, March 2, 2012

Campaign Week 3: All's Quiet on the Front

Because the campaign structure I'm using (once again, found on Saxe-Bearstein) grants both sides to return all units to their full strength at this point, I decided that the next battle shouldn't occur this game week, but the next. In that way, from a narrative perspective, the reinforcements have time to arrive, while the exhausted troops can heal, rest, resupply, etc.

Still, something must happen even if it's just to note the weather. Dutifully, I rolled for weather and supply: another stormy week on Helvetica. Further justification to withhold campaigning and to keep the troops stationary for the most part.

It also seemed logical to me that the commander in charge of all of Sauvignon-Blanc's forces on Helvetica would be displeased with Baudrillard's performance (the commander needs a name. Let's call him Colonel Duchamp). I decided to find out.

Ordinarily, I'd pose this to Mythic,use the RPG Lab's Solo Story System, or IN-RADIC (although it's meant to test the success or failure of an action, it works just fine for yes/no questions) and roll some dice for my answer. But, for the first time in weeks, I failed to bring any dice with me to work today.

rolz.org to the rescue. I brought up IN-RADIC on the screen and had at it:

Me:  "Is the commander displeased with Baudrillard?"
I figure this is A Dead Certainty and "roll". 
An 11!
IN-RADIC: Fail


I take fail to mean "No" which was not at all what I was expecting. The twists and turns of solo gaming!

Ok then. How am I going to explain this?

Maybe the old man has a soft spot for Baudrillard. Maybe Baudrillard is his son in law, wed to Duchamp's youngest, and if he had to admit it, favorite, daughter. That sounds plausible enough to me - of course, it doesn't really matter, but it makes the game that much more amusing.

Unrelated to this, I decided that I'll play out a scouting mission this game week- the results of which will determine how and where the next battle occurs. I'll be using a simple scouting game from a back issue of Lone Warrior - modified for my setting and the stormy weather.

The game will feature Pvt. Vendredi and his lizard folk companion, whose name, loosely translated from the lizard tongue is He-Who-Eats-the-Eyes-of-His-Enemy as they attempt to get back to Baudrillard with news of the movements of Rieslings force.

If there is combat (it's not a guarantee), then I'll modify the encounter by rolling 1d10:
Opponent(s) are:
1 -2 - Mantis-men
3 - 7 Hostile Lizard folk
8 - Really angry carnivorous dinosaur
9-10 - Mixed Riesling infantry/lizard folk

My intention is to use Two Hour Wargame's Chain Reaction 3.0: Final Version and make both characters stars. This may necessitate establishing a turn limit to get back to Baudrillard in time to be truly effective. In any case, it means I need to create my game mat for tracking everything.

Thursday, March 1, 2012

Painting Progress for February

Completed in February:
  • 24 1/72 Waterloo Japanese infantry for the WWII Pacific project- the intent, again, is to assemble forces to play out the scenario and rules presented in Lone Warrior #172. However, I also plan to play various historical encounters from Guadalcanal, Tarawa, etc. as well as semi-historical encounters and undoubtedly totally implausible ones as well.
Banzai!
A close(er) up.


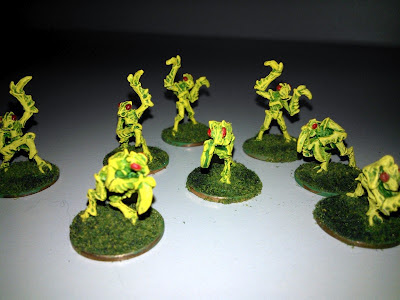
  • 8 15mm Khurasan mantis-men.
The females not only eat the males,  they eat humans too.

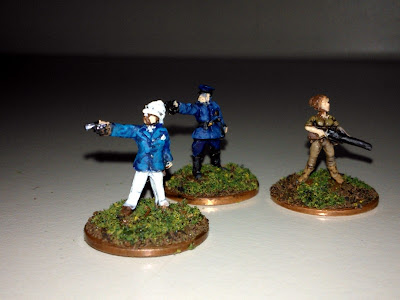
  • 3 15mm Khurasan Mystri Island characters
Lord  Chadwick, Oberst Neubauten, Lady Penelope Devane

  • 1 15mm Brigade Games G.A.S.L.I.G.H.T. character - I'm counting this, although I really am not happy with this one, I've repainted it multiple times and multiple ways. I just don't like the sculpt of the head, although he kind of looks like Ronald Reagan (Lady Shadowmoss agrees, so I'm not totally off on this), if the former president were cast as a rifle-toting Han Solo. At the moment he's covered in Sculpey to make a rocketeer, but that may change as I reconsider the possibility of Reagan-inspired scenarios.

There was a failed attempt at sculpting a 15mm one-off miniature from Sculpey without an armature.  Lesson learned. Green stuff has been ordered and I've downloaded more than one set of instructions for making armatures. The goal is to make my own photographer figure similar to the one in this set from Bluemoon. I really want the 1st figure in the second row, but I have no need for the entire set at this time.

Planned for March:

  • Finish the remaining 24 1/72 Japanese - they're already primed and ready to go.